advance
ドライビング シナリオ シミュレーションを 1 タイム ステップずつ進める
説明
isRunning = advance(scenario)drivingScenario オブジェクト scenario の SampleTime プロパティを使用します。この関数はシミュレーションのステータス isRunning を返します。
例
ドライビング シナリオを作成します。既定のサンプル時間である 0.01 秒を使用します。
scenario = drivingScenario;
30 メートルの直線道路をシナリオに追加します。道路は 2 車線です。
roadCenters = [0 0; 30 0];
road(scenario,roadCenters,'Lanes',lanespec(2));
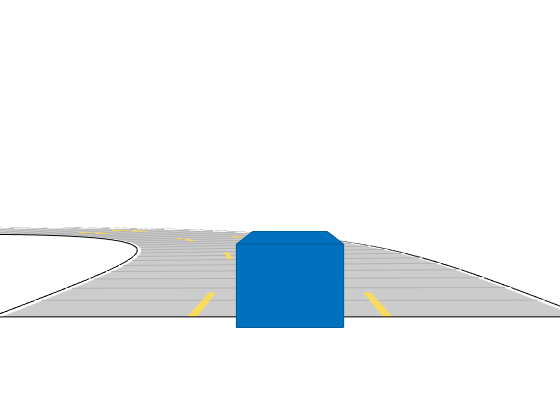
左車線を定速 30 メートル/秒で走行する車両を追加します。シミュレーションの実行前にシナリオをプロットします。
v = vehicle(scenario,'ClassID',1);
waypoints = [5 2; 25 2];
speed = 30; % m/s
smoothTrajectory(v,waypoints,speed)

plot(scenario)

ループ内で関数 advance を呼び出して、シミュレーションを 1 タイム ステップずつ進めます。0.01 秒ごとに一時停止して、プロット上の車両の運動を観察します。
while advance(scenario)
    pause(0.01)
end

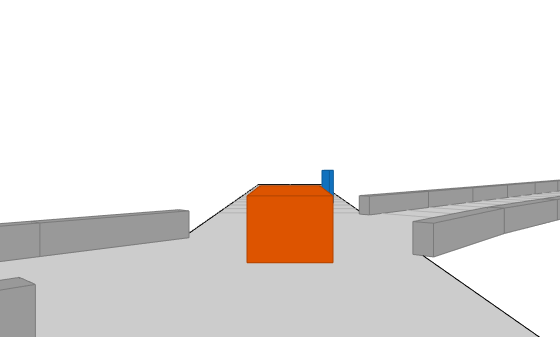
ドライビング シナリオを作成し、シミュレーションの進行に伴うターゲット アウトラインの変化を示します。
2 つの交差する直線道路で構成されたドライビング シナリオを作成します。1 つ目の道路セグメントの長さは 45 メートルです。2 つ目の直線道路は、長さが 32 メートルで、両端にジャージ障壁があり、1 つ目の道路と交差します。1 つ目の道路に沿って秒速 12.0 メートルで移動している車が、秒速 2.0 メートルで交差点を現在渡っている歩行者に近づいていきます。
scenario = drivingScenario('SampleTime',0.1,'StopTime',1);
road1 = road(scenario,[-10 0 0; 45 -20 0]);
road2 = road(scenario,[-10 -10 0; 35 10 0]);
barrier(scenario,road1)
barrier(scenario,road1,'RoadEdge','left')
ped = actor(scenario,'ClassID',4,'Length',0.4,'Width',0.6,'Height',1.7);
car = vehicle(scenario,'ClassID',1);
pedspeed = 2.0;
carspeed = 12.0;
smoothTrajectory(ped,[15 -3 0; 15 3 0],pedspeed);
smoothTrajectory(car,[-10 -10 0; 35 10 0],carspeed);
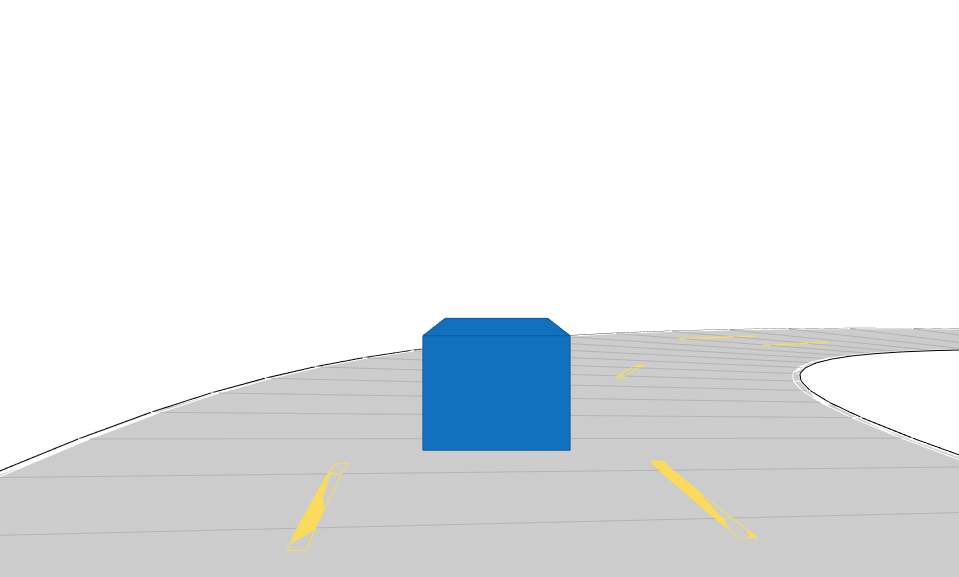
車両の自己を中心とした追跡プロットを作成します。
chasePlot(car,'Centerline','on')
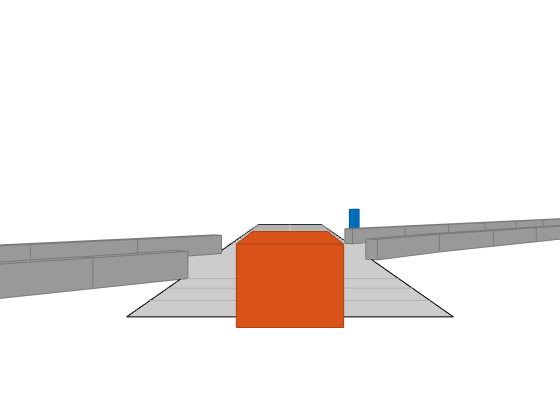
空の鳥瞰図プロットを作成し、アウトライン プロッターおよび車線境界線プロッターを追加します。次に、シミュレーションを実行します。各シミュレーション ステップは以下のとおりです。
追跡プロットを更新して、道路の境界およびターゲット アウトラインを表示する。
鳥瞰図プロットを更新して、更新した道路の境界およびターゲット アウトラインを表示する。プロットのパースペクティブは常に、自車が基準となっています。
bepPlot = birdsEyePlot('XLim',[-50 50],'YLim',[-40 40]);
outlineplotter = outlinePlotter(bepPlot);
laneplotter = laneBoundaryPlotter(bepPlot);
legend('off')

while advance(scenario)
    rb = roadBoundaries(car);
    [position,yaw,length,width,originOffset,color] = targetOutlines(car);
    [bposition,byaw,blength,bwidth,boriginOffset,bcolor,barrierSegments] = targetOutlines(car,'Barriers');
    plotLaneBoundary(laneplotter,rb)
    plotOutline(outlineplotter,position,yaw,length,width, ...
        'OriginOffset',originOffset,'Color',color)
    plotBarrierOutline(outlineplotter,barrierSegments,bposition,byaw,blength,bwidth, ...
        'OriginOffset',boriginOffset,'Color',bcolor)
    pause(0.01)
end
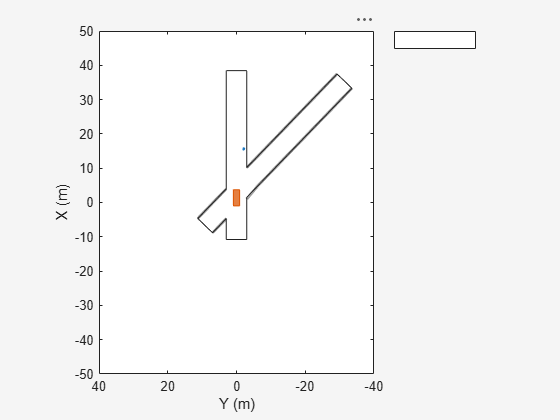
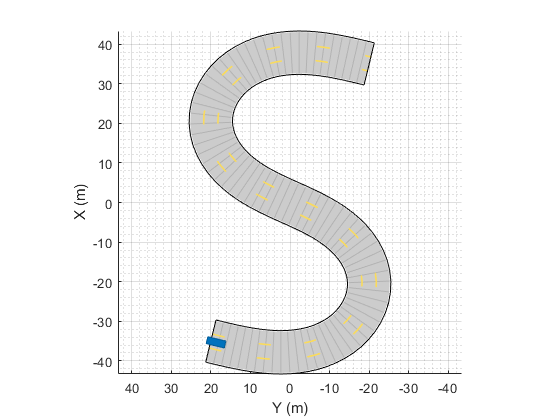
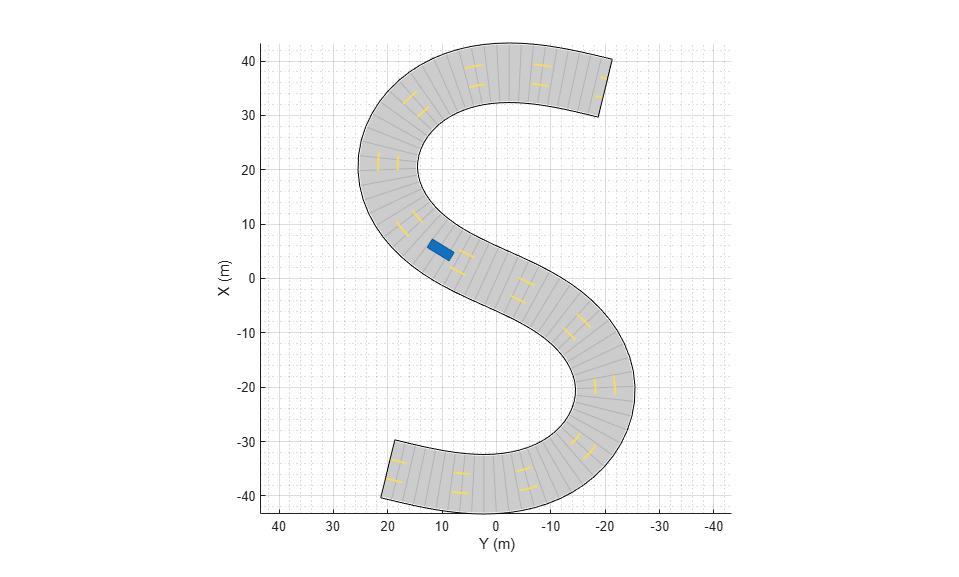
1 台の自動車が S 字カーブ上を走行するドライビング シナリオをシミュレートします。車線境界線を作成してプロットします。
S 字カーブをもつ 1 本の道路を使用して、ドライビング シナリオを作成します。
scenario = drivingScenario('StopTime',3);
roadcenters = [-35 20 0; -20 -20 0; 0 0 0; 20 20 0; 35 -20 0];
車線を作成して道路に追加します。
lm = [laneMarking('Solid','Color','w'); ...
    laneMarking('Dashed','Color','y'); ...
    laneMarking('Dashed','Color','y'); ...
    laneMarking('Solid','Color','w')];
ls = lanespec(3,'Marking',lm);
road(scenario,roadcenters,'Lanes',ls);
自車を追加し、そのウェイポイントから軌跡を指定します。自動車は、既定で 30 メートル/秒で走行します。
car = vehicle(scenario, ...
    'ClassID',1, ...
    'Position',[-35 20 0]);
waypoints = [-35 20 0; -20 -20 0; 0 0 0; 20 20 0; 35 -20 0];
smoothTrajectory(car,waypoints);
シナリオ、および対応する追跡プロットをプロットします。
plot(scenario)
chasePlot(car)
シミュレーション ループを実行します。
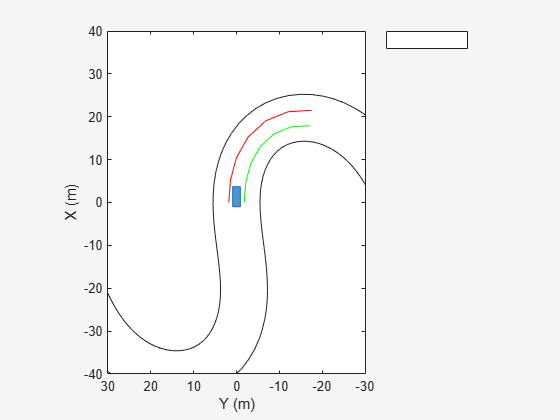
鳥瞰図プロットを初期化し、アウトライン プロッター、左車線と右車線の境界線プロッター、および道路境界線プロッターを作成します。
道路の境界線と四角形のアウトラインを取得します。
車両の左右にある車線境界線を取得します。
シミュレーションを進めてプロッターを更新します。
bep = birdsEyePlot('XLim',[-40 40],'YLim',[-30 30]);
olPlotter = outlinePlotter(bep);
lblPlotter = laneBoundaryPlotter(bep,'Color','r','LineStyle','-');
lbrPlotter = laneBoundaryPlotter(bep,'Color','g','LineStyle','-');
rbsEdgePlotter = laneBoundaryPlotter(bep);
legend('off');
while advance(scenario)
    rbs = roadBoundaries(car);
    [position,yaw,length,width,originOffset,color] = targetOutlines(car);
    lb = laneBoundaries(car,'XDistance',0:5:30,'LocationType','Center', ...
        'AllBoundaries',false);
    plotLaneBoundary(rbsEdgePlotter,rbs)
    plotLaneBoundary(lblPlotter,{lb(1).Coordinates})
    plotLaneBoundary(lbrPlotter,{lb(2).Coordinates})
    plotOutline(olPlotter,position,yaw,length,width, ...
        'OriginOffset',originOffset,'Color',color)
end
入力引数
出力引数
バージョン履歴
R2017a で導入