このページの内容は最新ではありません。最新版の英語を参照するには、ここをクリックします。
Unreal Editor でのアクターへのカメラの配置
Unreal® Editor のシーンでオブジェクトを可視化するために、シーン内の静的アクターまたはカスタム アクターにカメラを配置できます。開始するには、Vehicle Dynamics Blockset Interface for Unreal Engine Projects サポート パッケージが必要です。サポート パッケージのインストールと環境の構成を参照してください。
このワークフローに従うには、Unreal Engine® に関する知識が必要です。Visual Studio® 2022 がコンピューターにインストールされていることを確認してください。
静的アクターへのカメラの配置
次の手順に従って、Unreal Editor で、コーンからオフセットされた位置に Simulation 3D Camera Get ブロックを配置します。この例では Computer Vision Toolbox™ の To Video Display ブロックを使用しますが、別の可視化ブロックを使用してイメージを表示できます。
Simulink® モデルに、Simulation 3D Scene Configuration、Simulation 3D Camera Get、および To Video Display の各ブロックを追加します。

ブロック パラメーターを次のように設定します。Simulation 3D Scene Configuration ブロックで、[Unreal Editor を開く] を選択します。
ブロック パラメーター設定 Simulation 3D Scene Configuration
シーン ソース —
Unreal Editorプロジェクト — サポート パッケージのプロジェクト ファイルのパスと名前を指定します。例:
C:\Local\AutoVrtlEnv\AutoVrtlEnv.uproject
Simulation 3D Camera Get
センサー識別子 —
1親の名前 —
Scene Origin取り付け位置 —
Originオフセットを指定 —
on相対並進 [X, Y, Z] —
[-6, 0, 2]これは、コーンの取り付け位置から 6 m 後方、2 m 上にカメラ位置をオフセットします。
相対回転 [Roll, Pitch, Yaw] —
[0, 15, 0]
Unreal Editor の [File] 、 [Open Level] で
HwStraightを選択します。[Place Actors] タブで、[Sim 3d Scene Cap] をワールド、シーン、またはマップに追加します。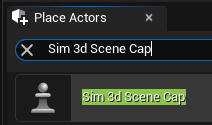
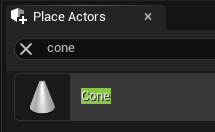
Unreal Editor の [Place Actors] タブで、[Cone] をワールド、シーン、またはマップに追加します。
[Outliner] タブで、[Sim3DSceneCap] を右クリックして [Cone] に取り付けます。

[Details] タブの [Transform] で、ワールド座標系の X、Y、Z にそれぞれ位置のオフセット
-500,0,100を加えます。これにより、カメラがコーンの後方 500 cm、上方 100 cm に取り付けられます。この値は、Simulation 3D Camera Get ブロック パラメーター [相対並進 [X, Y, Z]] の値と一致します。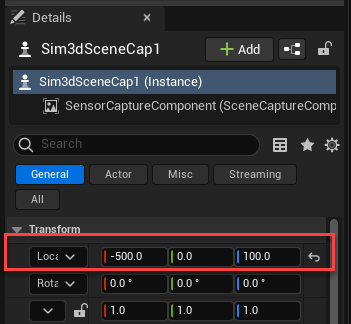
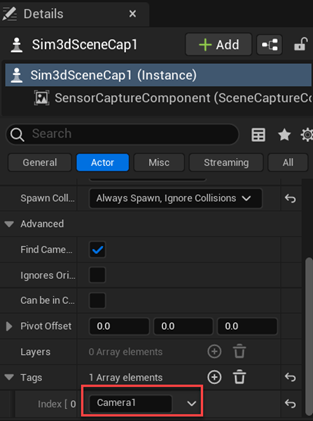
[Details] タブで、[Sim3DSceneCap] に名前 IdealCamera1 のタグを付けます。
シミュレーションを実行します。
Simulink モデルで [実行] をクリックします。
Unreal Editor で開かれるプロジェクトがシーンのソースであるため、シミュレーションは開始されません。
Simulink の [診断ビューアー] ウィンドウに次のメッセージが表示されていることを確認します。
In the Simulation 3D Scene Configuration block, you set the scene source to 'Unreal Editor'. In Unreal Editor, select 'Play' to view the scene.これは、Simulink が Unreal Engine 3D 環境で車両および他のアセットをインスタンス化したことを示す確認のメッセージです。
Unreal Editor で [Play] をクリックします。Unreal Editor で現在開いているシーンでシミュレーションが実行されます。
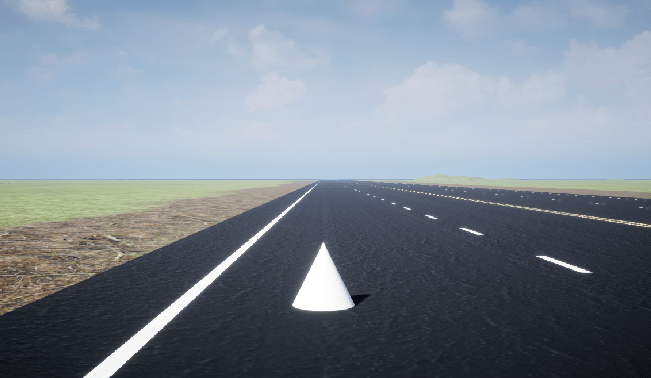
[To Video Display] ウィンドウで結果を観察します。このウィンドウには、カメラからのイメージが表示されます。
カスタム プロジェクトの車両へのカメラの配置
カスタムの Unreal Engine プロジェクトを作成し、そのプロジェクトの車両にカメラを配置するには、次の手順に従います。この例では Computer Vision Toolbox の To Video Display ブロックを使用しますが、別の可視化ブロックを使用してイメージを表示できます。
開始するには、Vehicle Dynamics Blockset Interface for Unreal Engine Projects サポート パッケージが必要です。サポート パッケージのインストールと環境の構成を参照してください。
Simulink モデルに、Simulation 3D Scene Configuration、Simulation 3D Camera Get、To Video Display、Simulation 3D Actor Transform Set の各ブロック、および 3 つの Constant ブロックを追加します。

モデルを保存します。
Epic Games® の Epic Games Launcher の [Vehicle] テンプレートを使用して、新規プロジェクトを作成します。
Epic Games Launcher で、Unreal Engine 5.3 を起動します。
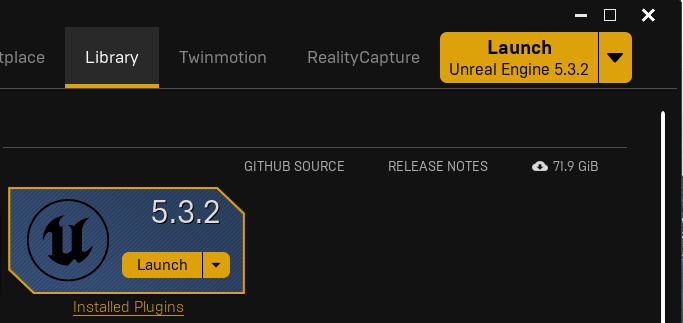
Epic Games Launcher の詳細については、Unreal Engine を参照してください。
Unreal Project Browser で、[Games] と [Vehicle] を選択します。
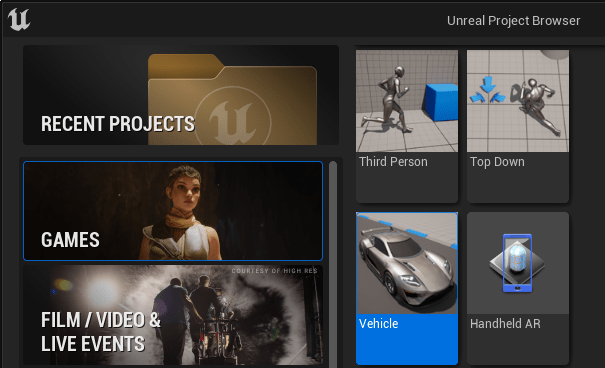
ブラウザーで、ブループリントまたは C++ プロジェクトを作成します。プロジェクトの名前と場所を指定します。[Create] をクリックします。

Epic Games Launcher で新規プロジェクトが作成され、Unreal Editor が開きます。
MathWorks® プラグインを有効にします。
[Edit] 、 [Plugins] を選択します。
[Plugins] タブで、MathWorks に移動します。MathWorks Interface など、有効にするコンテンツについて [Enabled] を選択します。

プロジェクトを保存します。Unreal Editor を閉じます。
手順 1 で保存した Simulink モデルを開きます。ブロック パラメーターを次のように設定します。
ブロック パラメーター設定 Simulation 3D Scene Configuration
シーン ソース —
Unreal Editorプロジェクト — 手順 2 で保存したプロジェクトのパスを指定します。例:
myProjectPath\myProject.uproject
Simulation 3D Camera Get
センサー識別子 —
1親の名前 —
Scene Origin取り付け位置 —
Origin
Simulation 3D Actor Transform Set
3D シーンのアクターのタグ —
MainCamera1
ActTranslation
定数値 —
[-11310.0 - 300, 8140.0, 100]/100ベクトル パラメーターを 1 次元として解釈 —
off
ActRotation
定数値 —
[0 0 0]ベクトル パラメーターを 1 次元として解釈 —
off
ActScale
定数値 —
[1 1 1]ベクトル パラメーターを 1 次元として解釈 —
off
Simulation 3D Scene Configuration ブロックで、[Unreal Editor を開く] を選択します。
車両
OffroadCar_Pawnを追加します。Unreal Editor の [Content Browser] で [All] 、 [Content] 、 [VehicleTemplate] 、 [Blueprints] に移動し、OffroadCar_Pawnを選択します。車両をワールド、シーン、またはマップにドラッグして放します。[Details] パネルで、[Auto Possess Player] をPlayer 0に設定します。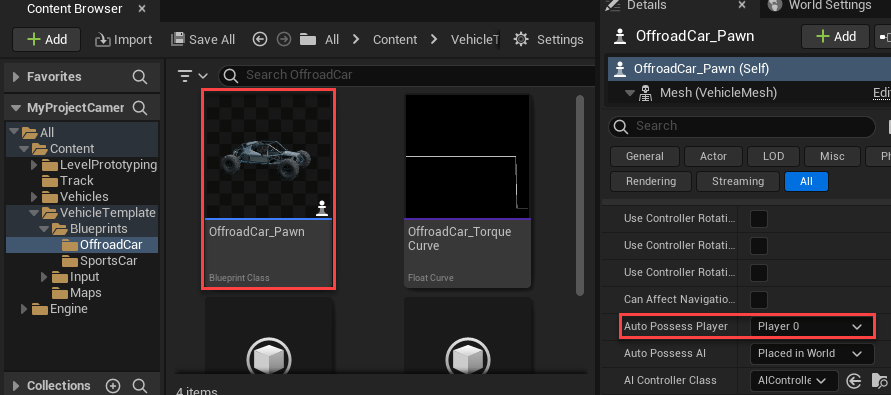
Unreal Editor の [Place Actors] タブで、[Sim 3d Scene Cap] をワールド、シーン、またはマップに追加します。
[Outliner] タブで、カメラを車両
OffroadCar_Pawnにドラッグして放し、カメラを取り付ける車両のソケットまたはボーンを選択します。この例では、[None] を選択します。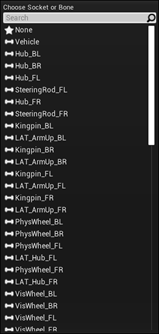
[Details] タブで、
Sim3dSceneCapに名前IdealCamera1のタグを付けます。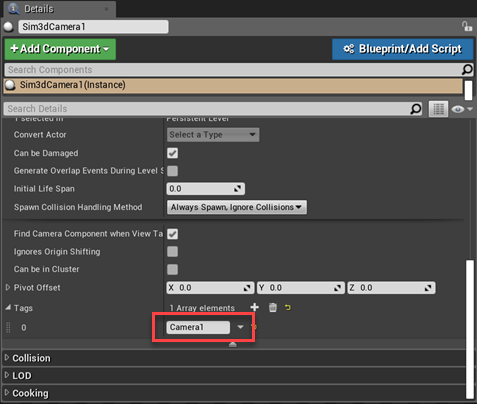
親クラスを設定します。
[Blueprints] で、[Open Level Blueprint] をクリックし、[Class Settings] を選択します。

[Class Options] で、[Parent Class] を
Sim 3d Level Script Actorに設定します。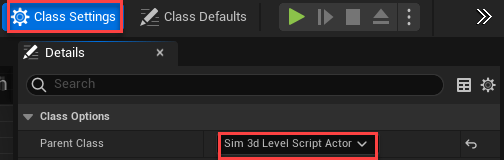
プロジェクトを保存します。
シミュレーションを実行します。
Simulink モデルで [実行] をクリックします。
Unreal Editor で開かれるプロジェクトがシーンのソースであるため、シミュレーションは開始されません。
Simulink の [診断ビューアー] ウィンドウに次のメッセージが表示されていることを確認します。
In the Simulation 3D Scene Configuration block, you set the scene source to 'Unreal Editor'. In Unreal Editor, select 'Play' to view the scene.これは、Simulink が Unreal Engine 3D 環境で車両および他のアセットをインスタンス化したことを示す確認のメッセージです。
Unreal Editor で [Play] をクリックします。Unreal Editor で現在開いているシーンでシミュレーションが実行されます。
参考
Simulation 3D Camera Get | Simulation 3D Scene Configuration