このページの内容は最新ではありません。最新版の英語を参照するには、ここをクリックします。
Unreal Editor でのカスタム アクターのアニメーション化
Unreal® Editor でカスタム アクターをアニメーション化するには、次の手順に従います。開始する前に、Visual Studio® 2022 と Vehicle Dynamics Blockset™ Interface for Unreal Engine® Projects サポート パッケージがマシンにインストールされていることを確認してください。詳細については、サポート パッケージのインストールと環境の構成を参照してください。
さらに、次のことを確認してください。
Unreal Engine での C++ のコーディングを理解していること。
Unreal Editor C++ プロジェクトに骨格となるアクターのメッシュが含まれていること。この例では二輪のメッシュを使用します。
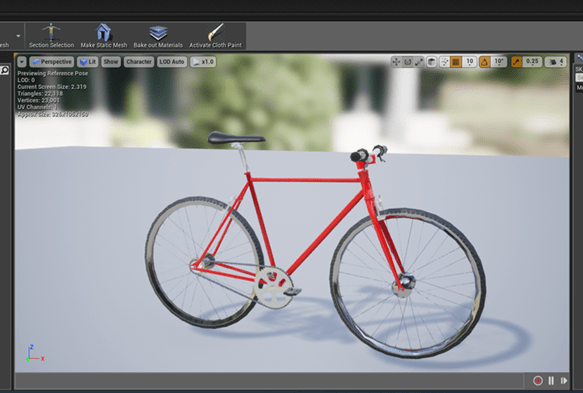
この例では、二輪アクターをアニメーション化するワークフローを示します。Unreal Engine の「ビークルのユーザー ガイド」から応用した一般的なワークフローを示しています。
Simulink モデルの設定
手順 1: Simulink モデルの設定
新しい Simulink® モデルを開き、次のブロックを追加します。
2 つの Ramp ブロック
Constant ブロック
Simulation 3D Actor Transform Set ブロック
Simulation 3D Scene Configuration ブロック
次のようにブロックを接続して名前を付けます。

手順 2: ブロックの構成
パラメーターを次のように設定してブロックを構成します。
| ブロック | パラメーター設定 |
|---|---|
Simulation 3D Scene Configuration |
|
Simulation 3D Actor Transform Set |
|
Translation Ramp |
|
Rotation Ramp |
|
Scale Constant |
|
二輪をアニメーション化するための Unreal Editor の設定
手順 3: アニメーション インスタンスの設定
Simulink モデルで、Simulation 3D Scene Configuration ブロックの [Unreal Editor を開く] パラメーターを使用して Unreal Editor を開きます。
[Tools] 、 [New C++ Class] を選択します。[Choose Parent Class] ダイアログ ボックスで、[All Classes] を選択します。
AnimInstを検索します。AnimInstanceを選択し、[Next] をクリックします。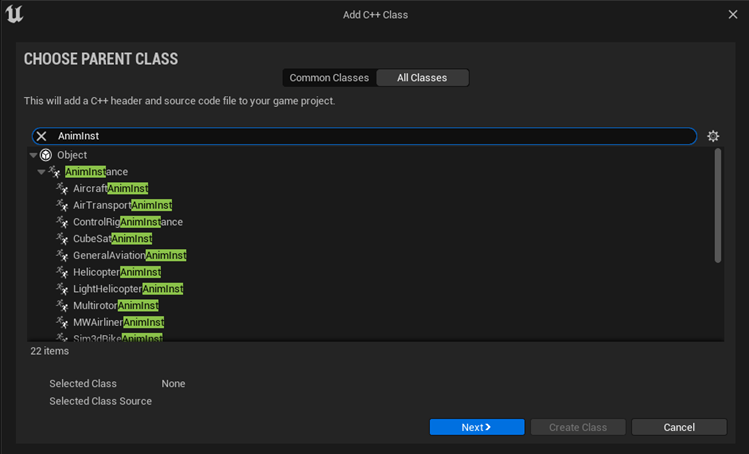
新しい C++ クラスに
SimulinkBikeAnimInstという名前を付けます。[Public] を選択します。[Create Class] をクリックします。
Visual Studio 2022 で、
C:\Local\AutoVrtlEnv\AutoVrtlEnv.slnファイルを開きます。ソース ファイルのSimulinkBikeAnimInst.cppとSimulinkBikeAnimInst.hに移動します。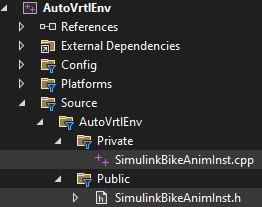
ファイルを次のように編集します。
ヒント
この例では、二輪の車輪の回転をアニメーション化するために
FWheelRotationプロパティとRWheelRotationプロパティをコードに含めています。プロパティをさらに追加して二輪の他のパーツをアニメーション化できます。Unreal Editor で [Compile] をクリックします。

手順 4: アニメーション ブループリントの作成
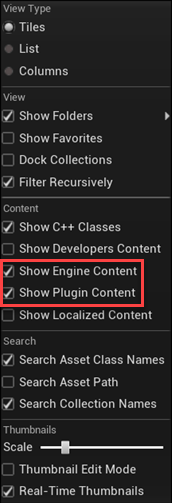
Unreal Editor の [Content Browser] タブで、[View Options] の下にある [Show Engine Content] と [Show Plugin Content] を選択します。
アニメーション メッシュを追加します。[Content Browser] タブで、[MathWorksInterface Content] 、 [Vehicles] 、 [Bicyclist] 、 [Meshes] に移動します。
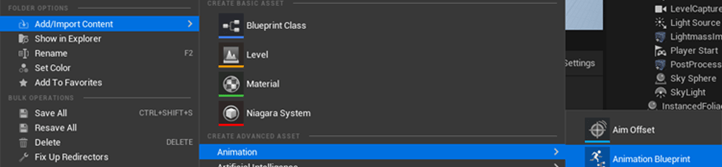
[Meshes] を右クリックし、[Add/Import Content] 、 [Animation] 、 [Animation Blueprint] を選択します。
[Create Animation Blueprint] ダイアログ ボックスで、次のように選択します。
Parent Class:
SimulinkBikeAnimInst
Target Skeleton:
SK_Bicycle_Skeleton
[Create] をクリックします。
ブループリントに
BikeAnimationという名前を付けます。右クリックして [Save] を選択します。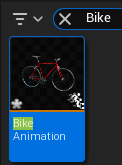
BikeAnimationブループリントをダブルクリックして開きます。次のように接続します。
メモ
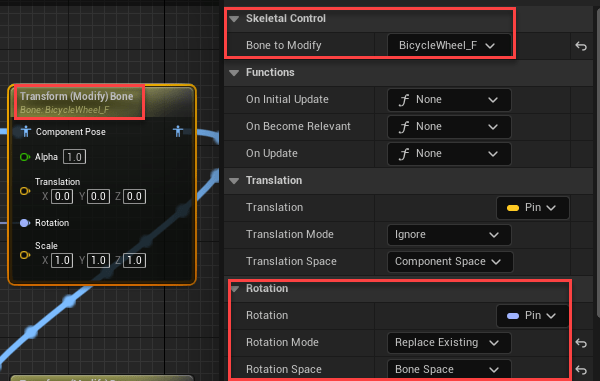
FWheel RotationとRWheel Rotationに対して、それぞれGet FWheel RotationとGet RWheel Rotationのブループリント ノードを選択します。前輪と後輪の両方について、次のように設定されていることを確認します。
[Bone to Modify] が正しいボーン
[Rotation Mode] が
[Replace Existing][Rotation Space] が
[Bone Space]
ブループリントをコンパイルして保存します。
手順 5: 二輪アクターの C++ クラスの作成
Unreal Editor の [Content Browser] タブで、[View Options] の下にある [Show Engine Content] と [Show Plugin Content] を選択します。
MathWorks Interface C++ Classes フォルダーから [Sim3dActor] を選択します。
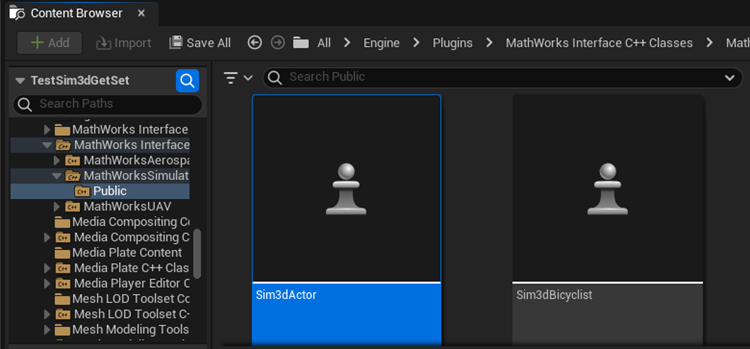
右クリックして [Create C++ class derived from Sim3dActor] を選択します。

ヒント
MathWorks Interface C++ Classes フォルダーが表示されない場合は、次の手順に従って、
MathWorks Interfaceプラグインがインストールされて有効になっていることを確認してください。Unreal Editor のツール バーで、[Edit] 、 [Plugins] を選択します。
[Plugins] ウィンドウで、インストール済みのウィンドウのリストに [MathWorks Interface] プラグインが表示されていることを確認します。プラグインがまだ有効になっていない場合は、[Enabled] チェック ボックスをオンにします。
エディターを閉じて Simulink から再度開きます。
新しい Sim3dActor に
BicycleActorという名前を付けます。[Public] を選択します。[Create Class] をクリックします。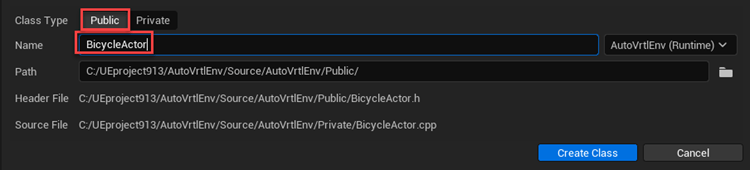
Visual Studio で、
BicycleActor.hとBicycleActor.cppに移動します。
ファイルを次のように編集します。
ヒント
この例では、車体 (
BIKE_BODY)、前輪 (FRONT_WHEEL)、および後輪 (REAR_WHEEL) をアニメーション化するためのロジックをコードに含めています。ロジックをさらに追加して二輪の他のパーツをアニメーション化できます。Unreal Editor で [Compile] をクリックします。
手順 6: 二輪アクターのインスタンス化
Simulink モデルで、Simulation 3D Scene Configuration ブロックの [Unreal Editor を開く] パラメーターを使用して Unreal Editor を開きます。
レベル
HwStraightを開きます。[File] 、 [Open Level] を選択し、HwStraightを選択します。シーン内に二輪アクターを配置します。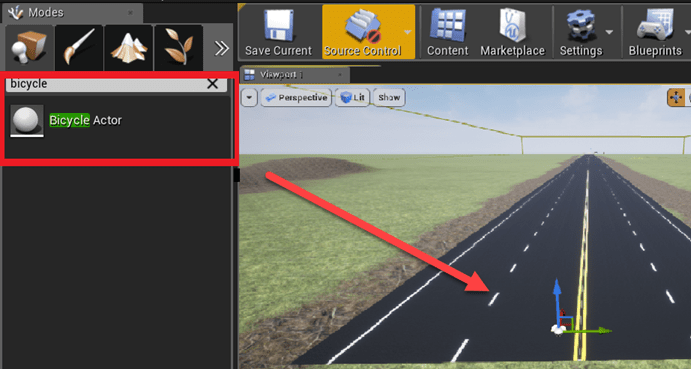
タグを Simulation 3D Actor Transform Set ブロックの [3D シーンのアクターのタグ、ActorTag] と同じ値に設定します。この例では、値を
Bike1に設定します。
カメラ ビューの設定 (オプション)
必要に応じて、カメラ ビューを設定して既定のビューをオーバーライドします。カメラ ビューは Simulink またはレベル ブループリントを使用して設定できます。推奨されるオプションは、Simulink を使用する方法です。
手順 7: Simulink の使用 (推奨)
二輪を追従するカメラ ビューを設定するには、次を行います。
モデルに次のブロックを追加します。
1 つの Ramp ブロック
1 つの Add ブロック
3 つの Constant ブロック
Simulation 3D Actor Transform Set ブロック
次のようにブロックを接続して名前を付けます。

ブロック パラメーターを次のように設定します。
ブロック パラメーター設定 Simulation 3D Actor Transform Set: Camera Control
3D シーンのアクターのタグ、ActorTag —
MainCamera1
CamTranslation
定数値 —
[0 -5.1 0.56]ベクトル パラメーターを 1 次元として解釈 —
off
CamRotation
定数値 —
[0 0 deg2rad(85)]ベクトル パラメーターを 1 次元として解釈 —
off
CamScale
定数値 —
[1 1 1]ベクトル パラメーターを 1 次元として解釈 —
off
手順 7: レベル ブループリントの使用
既定のカメラ ビューをオーバーライドするには、次を行います。
カメラ アクターを追加します。BicycleActor の子として割り当てます。
[Transform] の設定を使用して、位置と視点角度を指定します。

レベル ブループリントを開きます。

レベル ブループリントで、次のように接続します。[Event Graph] で右クリックしてノードを検索する場合は、[Context Sensitive] をオフにしてください。CameraActor がある場合は、エディターの [World Outliner] ビューから [Event Graph] にドラッグできます。

ブループリントとプロジェクトを保存します。Unreal Editor を閉じます。
シミュレーションの実行
Simulink モデルと Unreal Editor 環境を構成したら、シミュレーションを実行します。
Simulink モデルで、Simulation 3D Scene Configuration のパラメーターの値が次のように設定されていることを確認します。
シーン ソース —
Unreal Editorプロジェクト — インストールされているサポート パッケージのプロジェクト ファイルの名前と場所 (例:
C:\Local\AutoVrtlEnv\AutoVrtlEnv.uproject)。シーン ビュー —
Scene Origin
Simulation 3D Scene Configuration ブロックの [Unreal Editor を開く] パラメーターを使用して Unreal Editor を開きます。
シミュレーションを実行します。
Simulink モデルで [実行] をクリックします。
Unreal Editor で開かれるプロジェクトがシーンのソースであるため、シミュレーションは開始されません。
Simulink の [診断ビューアー] ウィンドウに次のメッセージが表示されていることを確認します。
In the Simulation 3D Scene Configuration block, you set the scene source to 'Unreal Editor'. In Unreal Editor, select 'Play' to view the scene.これは、Simulink が Unreal Engine 3D 環境で車両および他のアセットをインスタンス化したことを示す確認のメッセージです。
Unreal Editor で [Play] をクリックします。Unreal Editor で現在開いているシーンでシミュレーションが実行されます。
参考
Simulation 3D Actor Transform Set | Simulation 3D Scene Configuration