Deploy Deep Neural Networks to Qualcomm Targets Using Qualcomm AI Engine Direct (QNN)
This example shows the complete workflow for using the Simulink® blocks under the QNN Simulink® library in Embedded Coder Support Package for Qualcomm® Hexagon® Processors. The workflow covers both simulation of deep learning networks on the host computer and Processor-in-the-Loop (PIL) validation on the target device.
The Qualcomm® AI Engine Direct SDK, formerly known as QNN SDK, enables the deployment of deep learning neural networks across various hardware components (backends) - including the HTP (NPU), CPU, LPAI, and GPU - on supported Qualcomm platforms. The QNN Simulink library contains three blocks - QNN HTP Predict, QNN CPU Predict, QNN LPAI Predict, and QNN GPU Predict - that provide the interfaces to predict responses from the corresponding backend on the target device.
This example uses a simple deep learning neural network designed to classify handwritten digit images. The complete workflow involves these steps:
You can refer these sections to perform inference of QNN model on the Qualcomm® AI Engine Direct backends using the corresponding blocks:
Prerequisites
Install the Qualcomm AI Engine Direct SDK
Add Python to the system path
For details, refer to the Setup page in Qualcomm AI Engine Direct SDK documentation.
Required Hardware
Snapdragon X Elite Mobile (SM8750)
Train CNN on a Digit Image Dataset
This example uses a convolutional neural network (CNN) that has been pre-trained on a digit image dataset. For reference, you can review the original example here: Create Simple Deep Learning Neural Network for Classification (Deep Learning Toolbox). In this example, you modify the original workflow to normalize the input data prior to training the network. .
Unzip the dataset containing digit images to get a test image used in this example. Normalize the input images before making predictions with the trained network. To do this, convert the image data to single-precision and scale the pixel values in the [0, 1] range, matching the preprocessing used during training.
unzip("DigitsData.zip");
dataFolder = "DigitsData";

testImagePath = fullfile(dataFolder, "2", "image1001.png");
inputTestData = single(imread(testImagePath))/255;
imshow(inputTestData);

inputtestdata.time = 0;
inputtestdata.signals.values = inputTestData;
inputtestdata.signals.dimensions = [28, 28];
Load the trained deep learning network and obtain the reference scores. These are later used to compare with the predictions of the QNN blocks.
load("pretrained_network.mat", "net","classNames");

scores = predict(net,inputTestData);
referenceOutputClass = classNames{scores == max(scores)};
This examples includes a precompiled QNN model. To regenerate, set generateQNN to true.
%#ok<*UNRCH> generateQNN =false;
Convert MATLAB-based Deep Learning Network to ONNX format
To convert a MATLAB-based deep learning network to a QNN-compatible format, first export the network to ONNX.
if generateQNN
    exportONNXNetwork(net, "digitClassification.onnx", "BatchSize", 1, "OpsetVersion", 7);
end
Convert ONNX Model to QNN Model
To execute a deep learning network with QNN, convert the ONNX model into a QNN model using the standalone qnn-onnx-converter utility.
Note: Ensure that the QNN SDK and all necessary Python dependencies are installed, preferably within a Python virtual environment, as described in the Setup page in Qualcomm AI Engine Direct SDK documentation.
In the below example code, update the paths according to your local installation and execute the code.
Define the root directories for QNN SDK, Python virtual environment, and Android NDK, and setup the SDK dependencies.
if ispc
    QNN_SDK_ROOT = fullfile("C:\", "Qualcomm", "AIStack", "QAIRT", "2.29.0.241129");
    QNN_PYTHON_VENV = fullfile("C:\", "Qualcomm", "AIStack", "QAIRT", "2.29.0.241129","venv");
    ANDROID_NDK_ROOT = fullfile("C:\", "Qualcomm", "Hexagon_SDK", "6.1.0.1", "tools", "android-ndk-r25c");
    python_cmd = "python";
    os_arch_folder = "x86_64-windows-msvc";
else
    QNN_SDK_ROOT = fullfile("/home", "Qualcomm", "aistack", "qairt", "2.29.0.241129");
    QNN_PYTHON_VENV = fullfile("/home", "MY_ENV_NAME");
    ANDROID_NDK_ROOT = fullfile("/home", "Qualcomm", "Hexagon_SDK", "6.2.0.1", "tools", "android-ndk-r25c");
    python_cmd = "python";
    os_arch_folder = "x86_64-linux-clang";
end

setupQNNDependencies(char(QNN_SDK_ROOT), char(QNN_PYTHON_VENV), char(ANDROID_NDK_ROOT));
ANDROID_NDK_ROOT is not set or valid folder, hence ignore this
if generateQNN
    % Convert the ONNX model to QNN Source using the qnn-onnx-converter utility
    generateQNNSharedLibrary( ...
        QNN_SDK_ROOT,...
        os_arch_folder,...
        python_cmd,...
        'digitClassification.onnx', ...
        'digitClassification' ...
        );
end
Perform Inference of QNN Model Using QNN CPU Predict
To perform inference for the CPU backend of Qualcomm AI Engine Direct, use a shared object library built for the target operating system. For Simulink to determine the network layers, obtain network information, and provide a host-simulation reference, the shared object for x86_64-linux-clang or x86_64-windows-msvc is required.
Open the Simulink model and set the appropriate QNN model (based on the host), which is used to obtain the network's information and host emulator output.
mdl = "qnn_cpu_test";
open_system(mdl);

if ispc
    set_param(mdl + "/blk", "QNNHostModel", fullfile("output", "x64", "digitClassification.dll"));
else
    set_param(mdl + "/blk", "QNNHostModel", fullfile("output", "x86_64-linux-clang", "libdigitClassification.so"));
end
set_param(mdl + "/blk", "QNNTargetModel", fullfile("output", "aarch64-android", "libdigitClassification.so"));
set_param(mdl + "/in", "VariableName", "inputtestdata");

out = sim(mdl, "SimulationMode", "normal", "StopTime", "0");
Configure the CoderTargetData in the model's configset for PIL verification, by using the configurePILHardwareBoard utility.
configurePILHardwareBoard(mdl, "Qualcomm Android Board", "USB", "52ed31ad");
outpil = sim(mdl, "SimulationMode", "processor-in-the-loop (pil)", "StopTime", "0");
The comparePILSimulation function compares the MATLAB reference, QNN host reference, and the target output (PIL) outputs.
comparePILSimulation(out, outpil, classNames, referenceOutputClass);
close_system(mdl,0);
Perform Inference of QNN Model Using QNN HTP Predict
To perform inference for the HTP (NPU) backend of Qualcomm AI Engine Direct, use the QNN model as a shared object or a cached context binary. Because the QNN model is in floating-point format, it is recommended that you enforce execution in float16 for improved HTP performance.
Steps:
Create a Configuration File for HTP Backend. To enable
float16execution and target the correct DSP architecture (v75), use the utility functions that generate the necessary configuration files.Generate the cached context binary. Use the
qnn-context-binary-generatorutility from the QNN SDK along with your configuration file to produce the context binary.
Note: Context binary generation is supported only on Linux hosts.
if generateQNN
    if isunix
        % Generate minimal sub-configuration for HTP (NPU) in float16 format
        createHTPConfigFile("v75", "digitClassification", "htp_sub_config.json");
        createTopLevelConfigFile("HTP", "htp_config.json", "htp_sub_config.json");

        % Generate the shared object for both "x86_64-linux-clang" & "aarch64-android"
        cmd = "${QNN_SDK_ROOT}/bin/x86_64-linux-clang/qnn-context-binary-generator " + ...
            "--backend ${QNN_SDK_ROOT}/lib/x86_64-linux-clang/libQnnHtp.so " + ...
            "--model output/x86_64-linux-clang/libdigitClassification.so " + ...
            "--config_file ./output/htp_config.json " + ...
            "--binary_file digitClassification.serialized ";

        [status, message] = system(cmd);

        if status ~= 0
            error("Context binary generation failed: %s", message);
        else
            fprintf("\nContext binary generated successfully\n");
        end
    end
end
Note: On Linux, the generated context binary is sufficient for both host simulations and target deployments. However, on Windows, the host QNN model (shared object, such as .dll) is still required for simulation purposes.
Open the Simulink model and perform PIL verification for the QNN context binary on the target.
mdl = "qnn_htp_test";
open_system(mdl);

set_param(mdl + "/blk", "DLNetworkFormat", "BINARY");
set_param(mdl + "/blk", "QNNContextBinary", fullfile("output", "digitClassification.serialized.bin"));
if ispc
    set_param(mdl + "/blk", "QNNHostModel", fullfile("output", "x64", "digitClassification.dll"));
end
set_param(mdl + "/in", "VariableName", "inputtestdata");

out = sim(mdl, "SimulationMode", "normal", "StopTime", "0");

configurePILHardwareBoard(mdl, "Qualcomm Android Board", "USB", "52ed31ad");
outpil = sim(mdl, "SimulationMode", "processor-in-the-loop (pil)", "StopTime", "0");

comparePILSimulation(out, outpil, classNames, referenceOutputClass);
close_system(mdl,0);
Perform Inference of QNN Model Using QNN HTP Predict from a cDSP Client
You can also invoke HTP inference from a cDSP client. This is particularly useful for offloading inference workloads directly to the Hexagon DSP, leveraging the specialized hardware for improved performance and efficiency. In the support package, this can be achieved by generating the model code for the cDSP by selecting the Qualcomm Hexagon Android Board target.
For this deployment, the cached context binary format of the QNN model is recommended.
The CoderTargetData must include the correct Hexagon processor version, with the processing unit set to cDSP.
mdl = "qnn_htp_native_test"; open_system(mdl);

set_param(mdl + "/blk", "DLNetworkFormat", "BINARY");
set_param(mdl + "/blk", "QNNContextBinary", fullfile("output", "digitClassification.serialized.bin"));
if ispc
    set_param(mdl + "/blk", "QNNHostModel", fullfile("output", "x64", "digitClassification.dll"));
end
set_param(mdl + "/in", "VariableName", "inputtestdata");

configurePILHardwareBoard(mdl, "Qualcomm Hexagon Android Board", "USB", "52ed31ad", "V79", "cdsp");
outpil = sim(mdl, "SimulationMode", "processor-in-the-loop (pil)", "StopTime", "0");

comparePILSimulation(out, outpil, classNames, referenceOutputClass);
close_system(mdl,0);
Perform Inference of QNN model Using QNN LPAI Predict
To perform inference for LPAI backend, the quantized QNN model must be in the context binary format. Also, this backend is only supported for eNPU version v5 and above. Create the quantized context binary and configure the block for host simulation.
To quantize, the qnn-onnx-converter requires input training vectors. The generateRawDataForQuantization utility exports the images from DigitsData.zip to raw data format files.
if generateQNN
    fileList = generateRawDataForQuantization();
    modelName = 'qDigitClassification';
    generateQNNSharedLibrary(QNN_SDK_ROOT, os_arch_folder, python_cmd, 'digitClassification.onnx', modelName, fileList);

    if isunix
        createLPAIConfigFile("lpai_sub_config.json");
        createTopLevelConfigFile("LPAI", "lpai_config.json", "lpai_sub_config.json");

        cmd = "${QNN_SDK_ROOT}/bin/x86_64-linux-clang/qnn-context-binary-generator " + ...
            "--backend ${QNN_SDK_ROOT}/lib/x86_64-linux-clang/libQnnLpai.so " + ...
            "--model output/x86_64-linux-clang/libqDigitClassification.so " + ...
            "--config_file ./output/lpai_config.json " + ...
            "--binary_file qDigitClassification.lpai ";
        [status, message] = system(cmd);
        if status ~= 0
            error("Context binary generation failed: %s", message);
        else
            fprintf("\nContext binary generated successfully\n");
        end
    end
end
Open the Simulink model and perform PIL verification for the QNN context binary on the target. In the below code, the host and target outputs are obtained from the quantized deep learning model.
mdl = "qnn_lpai_test"; open_system(mdl);

set_param(mdl + "/blk", "LPAIVersion","v5");
set_param(mdl + "/blk", "QNNContextBinary", fullfile("output", "qDigitClassification.lpai.bin"));
if ispc
    set_param(mdl + "/blk", "QNNHostModel", fullfile("output", "x64", "qDigitClassification.dll"));
end
set_param(mdl + "/in", "VariableName", "inputtestdata");

out = sim(mdl, "SimulationMode", "normal", "StopTime", "0");

configurePILHardwareBoard(mdl, "Qualcomm Android Board", "USB", "52ed31ad");
outpil = sim(mdl, "SimulationMode", "processor-in-the-loop (pil)", "StopTime", "0");

comparePILSimulation(out, outpil, classNames, referenceOutputClass);
close_system(mdl,0);
Perform Inference of QNN Model Using QNN LPAI Predict from a aDSP Client
You can also invoke LPAI inference from a aDSP client. This is particularly useful for offloading inference workloads directly to the Hexagon DSP, leveraging the specialized hardware for improved performance and efficiency. In the support package, this can be achieved by generating the model code for the aDSP by selecting the Qualcomm Hexagon Android Board target.
For this deployment, the cached context binary format of the QNN model is recommended.

The CoderTargetData must include the correct Hexagon processor version, with the processing unit set to aDSP.
mdl = "qnn_lpai_native_test"; open_system(mdl);

set_param(mdl + "/blk", "LPAIVersion","v5");
set_param(mdl + "/blk", "QNNContextBinary", fullfile("output", "qDigitClassification.lpai.bin"));
if ispc
    set_param(mdl + "/blk", "QNNHostModel", fullfile("output", "x64", "qDigitClassification.dll"));
end
set_param(mdl + "/in", "VariableName", "inputtestdata");

configurePILHardwareBoard(mdl, "Qualcomm Hexagon Android Board", "USB", "52ed31ad", "V79", "adsp");
outpil = sim(mdl, "SimulationMode", "processor-in-the-loop (pil)", "StopTime", "0");

comparePILSimulation(out, outpil, classNames, referenceOutputClass);
close_system(mdl,0);
Perform Inference of QNN Model Using QNN GPU Predict
To perform inference for the GPU backend of Qualcomm AI Engine Direct, use the QNN model as a shared object. For Simulink to determine the network layers, obtain network information, and provide a host-simulation reference, the shared object for x86_64-linux-clang or x86_64-windows-msvc is required.
Open the Simulink model and perform PIL verification for the QNN model on the target.
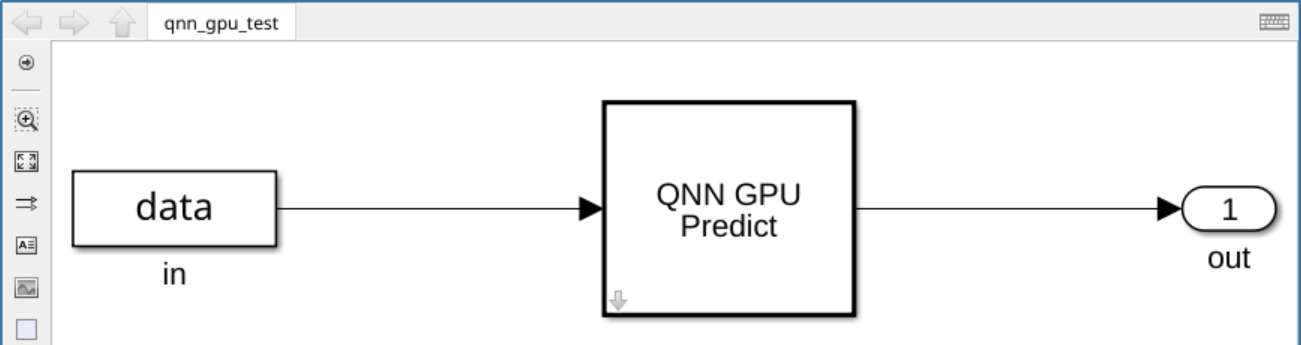
mdl = "qnn_gpu_test";
open_system(mdl);

if ispc
    set_param(mdl + "/blk", "QNNHostModel", fullfile("output", "x64", "digitClassification.dll"));
else
    set_param(mdl + "/blk", "QNNHostModel", fullfile("output", "x86_64-linux-clang", "libdigitClassification.so"));
end
set_param(mdl + "/blk", "QNNTargetModel", fullfile("output", "aarch64-android", "libdigitClassification.so"));

set_param(mdl + "/in", "VariableName", "inputtestdata");

out = sim(mdl, "SimulationMode", "normal", "StopTime", "0");

configurePILHardwareBoard(mdl, "Qualcomm Android Board", "USB", "52ed31ad");
outpil = sim(mdl, "SimulationMode", "processor-in-the-loop (pil)", "StopTime", "0");

comparePILSimulation(out, outpil, classNames, referenceOutputClass);
close_system(mdl,0);
See Also
QNN HTP Predict | QNN CPU Predict | QNN LPAI Predict | Troubleshoot Qualcomm AI Engine Direct Setup for Windows and Linux | Launch Hardware Setup