Place External C/C++ Code in Generated Code
You can customize code that the code generator produces for a model by placing external code into the specific location of the generated code. For example, you can:
Place external code at the start and end of the generated code for the root model.
Place declaration, body, and exit code in generated function code for blocks in the root model or nonvirtual subsystems.
The functions that you can augment with external code depends on the functions that the code generator produces for blocks that are in the model. For example, if a model or atomic subsystem includes blocks that have states, you can specify code for a disable function. Likewise, if you need the code for a block to save data, free memory, or reset target hardware, specify code for a terminate function. For more information, see Block Target File Methods.
For other methods of integrating external code with the generated code, see Choose an External Code Integration Workflow.
Choose an Integration Approach
Within the Simulink® modeling environment, two approaches are available for placing external C/C++ code into the generated code:
Adding custom code blocks.
Setting configuration parameters on the Code Generation > Custom Code pane.
Custom code blocks provide you more flexibility to control the positioning of the external code into the generated code. For example, you can control whether you want to insert the external code precisely at the bottom or end of the generated code or at the declaration, body, and exit of the generated function code. Precisely controlling the positing of the external code is necessary for:
Profiling of a system function
Disabling and enabling interrupts
Tracing comments that are required by build environments to correctly integrate system code.
The following table compares the two approaches. Choose the approach that aligns best with your integration requirements.
| Requirement | Blocks | Model Configuration Parameters |
|---|---|---|
| Include a representation of your external code in the modeling canvas. | ✓ | |
| Place code in functions generated for root models. | ✓ | ✓ |
| Place code in functions generated for atomic subsystems. | ✓ | |
| Save code placement in a model configuration set. | ✓ | |
| Place code at the top and bottom of the header and source files generated for a model. | ✓ | |
| Place code near the top of the header and source files generated for a model. | ✓ | |
Place code inside of the SystemInitialize
and SystemTerminate functions that the code
generator creates. | ✓ | |
Place code within declaration, execution, and exit sections of
the SystemInitialize and
SystemTerminate functions that the code
generator creates. | ✓ | |
Place code within declaration, execution, and exit sections of
the SystemStart,
SystemEnable,
SystemDisable,
SystemOutputs,
SystemUpdate, or
SystemDerivatives functions that the code
generator creates. | ✓ | |
| Add preprocessor macro definitions to generated code. | ✓ | |
| Use the custom code settings that are specified for the simulation target. | ✓ | |
| Configure a library model to use custom code settings of the parent model to which the library is linked. | ✓ |
For more information about how to apply each approach, see Integrate External Code by Using Custom Code Blocks (Embedded Coder) and Integrate External Code by Using Model Configuration Parameters (Embedded Coder).
Integrate External Code by Using Custom Code Blocks
Custom Code Block Library
The Custom Code block library contains blocks that you can use to place
external C or C++ code into specific locations and functions of the generated
code. The library consists of 10 blocks that add your code to the model header
(model.h) and source
(model.c or
model.cpp) files that the code
generator produces.
The Model Header and Model Source blocks can add external code at the top and bottom of header and source files that the code generator produces for a root model. These blocks have two text fields into which you can type or paste code. One field specifies code that you want to place at the top of the generated header or source file. The second field specifies code that you want to place at the bottom of the file.
The remaining blocks add external code to functions that the code generator produces for the root model or atomic subsystem that contains the block. The blocks display text fields into which you can type or paste code that customizes functions that the code generator produces. The text fields correspond to the declaration, execution, and exit sections of code for a given function.
| To Customize Code That | Use This Block |
|---|---|
| Computes continuous states | System Derivatives |
| Disables state | System Disable |
| Enables state | System Enable |
| Resets state | System Initialize |
| Produces output | System Outputs |
| Executes once | System Start |
| Saves data, free memory, reset target hardware | System Terminate |
| Requires updates at each major time step | System Update |
The block and its location within a model determines where the code generator
places the external code. For example, if the System Outputs
block is at the root model level, the code generator places the code in the
model Outputs function. If the block resides in a triggered
or enabled subsystem, the code generator places the code in the subsystem
Outputs function.
If the code generator does not need to generate a function that corresponds to a Custom Code block that you include in a model, the code generator does one of the following:
Omits the external code that you specify in the Custom Code block.
Returns an error, indicating that the model does not include a relevant block. In this case, remove the Custom Code block from the model.
For more information, see Block Target File Methods.
Note
To avoid a potential mismatch between simulation and code generation results, do not use custom code blocks to read from and write to global Simulink data (signals, states, and block parameters). Instead, use the proper modeling pattern (for example, Data Store Read, Data Store Write, State Reader, and State Writer blocks.)
Add Custom Code Blocks to the Modeling Canvas
To add the Custom Code library blocks to a model:
In the Simulink Library Browser, expand the
Simulink
                                Coder
node then select the Custom Code block library.Drag the blocks that you want into your model or subsystem. Drag Model Header and Model Source blocks into root models only. Drag function-based Custom Code blocks into root models or atomic subsystems.
You can use models that contain Custom Code blocks as referenced models. The code generator ignores the blocks when producing code for a simulation target. When producing code for a code generation target, the code generator includes and compiles the custom code.
Place External Code in Generated start function
This example shows how to use the System Start block to place
external C code into the declaration and execution sections of the
start function that the code generator produces for a
model containing a Discrete filter.
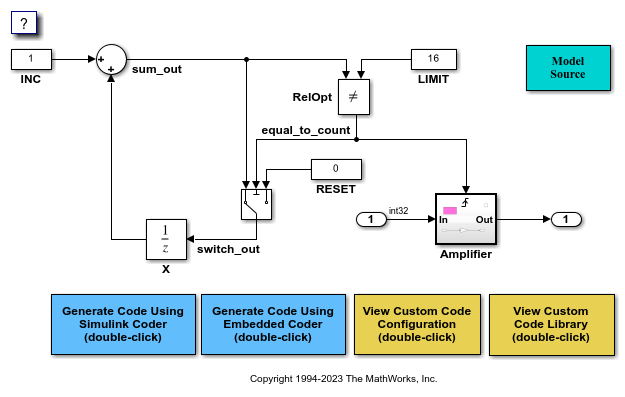
Create the following model.

Configure the model for code generation.
Double-click the System Start block.
In the block parameters dialog box, in the System Start Function Declaration Code field, enter this code:
unsigned int *ptr = 0xFFEE;
In the System Start Function Execution Code field, enter this code:
/* Initialize hardware */
*ptr = 0;
Click OK.
Generate code and a code generation report.
View the generated
model.cstart function. You should find the following code, which includes the external code that you entered in steps 4 and 5 into the right places.{ { /* user code (Start function Header) */ /* System '<Root>' */ unsigned int *ptr = 0xFFEE; /* user code (Start function Body) */ /* System '<Root>' */ /* Initialize hardware */ *ptr = 0; } }
Integrate External Code by Using Model Configuration Parameters
Model configuration parameters provide a way to place external C or C++ code into specific locations and functions within code that the code generator produces.
| To | Select |
|---|---|
Insert external code near the top of the generated
| Additional code, and enter the external code to insert. If you generate subsystem
code into separate files, that code does not have access to
external code that you specify with the Additional
code parameter. For example, if you specify an
include file as a Additional code setting,
the code generator inserts the |
Insert external code near the top of the generated
| Include headers, and enter the external code to insert. |
Insert external code inside the model initialize function in the
| Initialize code, and enter the external code to insert. |
Insert external code inside the model terminate function in the
| Terminate code, and enter the external code to insert. Also select the Terminate function required parameter on the Interface pane. |
| Add preprocessor macro definitions | Defines, and enter a space-separated list of
preprocessor macro definitions to add to the generated code. The
list can include simple definitions (for example,
-DEF1) and definitions with a value (for
example, -DDEF2=1). Definitions can omit the
-D (for example, -DFOO=1
and FOO=1 are equivalent). If a definition
includes -D, the toolchain can override the flag
if the toolchain uses a different flag for defines. |
| Use the same custom code parameter settings as the settings specified for simulation of MATLAB Function blocks, Stateflow® charts, and Truth Table blocks | Use the same custom code settings as Simulation Target This parameter refers to the Simulation Target pane in the Configuration Parameters dialog box. |
| Enable a library model to use custom code settings unique from the parent model to which the library is linked | Use local custom code settings (do not inherit from main model) This parameter is available only for library models that contain MATLAB Function blocks, Stateflow charts, or Truth Table blocks. |
To include a header file in an external header file, add
#ifndef code. Using this code avoids multiple inclusions. For
example, in rtwtypes.h, the following #include
guards are
added:
#ifndef RTW_HEADER_rtwtypes_h_
#define RTW_HEADER_rtwtypes_h_
...
#endif /* RTW_HEADER_rtwtypes_h_ */
For more information on how to add files names and locations of header, source, and shared library files to the build process, see Build Integrated Code Within the Simulink Environment.
Note
The code generator includes external code that you include in a configuration set when generating code for software-in-the-loop (SIL) and processor-in-the-loop (PIL) simulations. However, the code generator ignores external code that you include in a configuration set when producing code with the S-function, rapid simulation, or simulation system target file.
Integrate External C Code into Generated Code by Using Model Configuration Parameters
This example shows how to place external code in generated code by using model configuration parameters.
1. Open the model CustomCode.
open_system('CustomCode')
2. Open the Simulink Coder or Embedded Coder app.
3. Open the Model Configuration Parameters dialog box and navigate to the Custom Code pane.
4. On the Additional source code tab, examine the settings for model configuration parameters Additional code and Initialize code.
Additional code specifies a comment and sets the variable
GLOBAL_INT2to -1.Initialize code initializes the variable
GLOBAL_INT2to 1.
5. Close the dialog box.
6. Generate code and a code generation report.
7. Examine the code in the generated source file CustomCode.c. At the top of the file, after the #include statements, you find the following declaration code.
int_T GLOBAL_INT2 = -1;
The following assignment appears in the model initialize entry-point function. The example specifies this assignment with the Initialize code configuration parameter.
GLOBAL_INT2 = 1;