Use Preconfigured WSL Environment for PX4
R2026bUse a preconfigured Windows® Subsystem for Linux (WSL) distribution to set up the PX4® development environment. The distribution includes the PX4 firmware source code, toolchain, and required dependencies, enabling you to build and deploy PX4 firmware from Simulink without performing a manual PX4 environment setup.
Prerequisites
MATLAB® R2026a or higher installed
UAV Toolbox Support Package for PX4 Autopilots installed
Windows Subsystem for Linux (WSL) enabled
Launch Hardware Setup
If the support package is already installed, you can start the hardware setup by
opening the Add-Ons panel. To open the Add-Ons panel, click the
Add-Ons icon  on the left sidebar.
In the Add-Ons panel, click the Options
 button next to the installed support package, and
click Setup to start the hardware setup process.
button next to the installed support package, and
click Setup to start the hardware setup process.
Choose Ubuntu Distribution Option
In the Choose Ubuntu Distribution Option screen, select how you would like to set up your Ubuntu distribution for PX4 development.

Select Import pre-configured Ubuntu distribution for PX4 (Recommended) and then click Next.
Import Pre-configured PX4 Environment
In the Import Pre-configured PX4 Environment screen, download
the preconfigured Ubuntu 22.04 distribution with PX4 firmware and toolchain, import
it into WSL, and validate the configuration. The distribution name must be
PX4-Ubuntu-22.04 for the wizard to detect it.
The preconfigured distribution tar file contains:
Ubuntu 22.04 LTS (Jammy) base filesystem
Pre-configured user
simulinkpx4userwith sudo accessWSL configuration with
appendWindowsPath=falseand the default user set tosimulinkpx4userPX4-Autopilot git repository at
~/myPX4/PX4-Autopilotchecked out to the specified firmware version (for example, v1.15.4) with all submodules initializedPX4 build toolchain installed via
Tools/setup/ubuntu.sh(ARM cross-compiler,cmake,ninja-build, and related dependencies)

Note
If you have an existing PX4 WSL environment, save a backup before proceeding with this workflow. For more information, see Back Up a WSL Distribution.
Download the tar file — From the drop-down list, select Download new tar file. Click Download and select the location to save the file.

Wait for the download to complete. A confirmation message indicates that the download completed successfully.

Copy and run the import command
From the To import, run in drop-down list, select Command Prompt or PowerShell. The import command updates based on your selection.
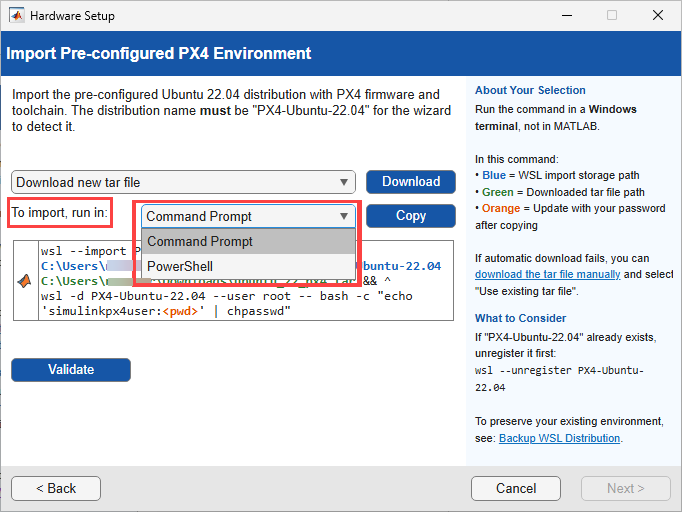
Click Copy to copy the command.
Open the selected command-line application (Command Prompt or PowerShell), run the copied command, and wait for the import operation to complete.
Validate — Click Validate to verify that the distribution was imported successfully. When validation passes, a confirmation message is displayed.
Click Next to continue with the setup.
Install Python 3.8.2 Software
Python 3.8.2 and pySerial 3.4 are required to upload the PX4 executable on the Autopilot connected to the Windows PC.
If Python 3.8 is not installed on your PC, select Automatically download and install and click Next.
If you have already installed Python 3.8.2 (or any other version of Python 3.8 with the same minor version but different patch version, such as Python 3.8.1 or 3.8.3), select I have already installed Python 3.8.2 and click Next.
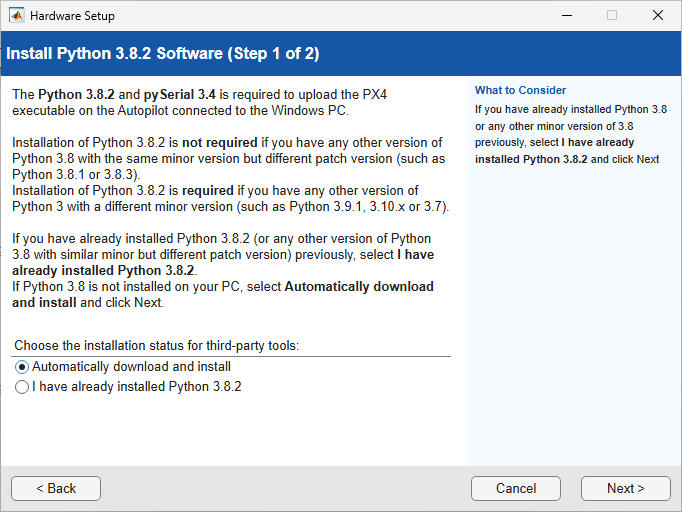
Note
Installation of Python 3.8.2 is required if you have any other version of Python 3 with a different minor version (such as Python 3.9.1, 3.10.x, or 3.7).
Validate PX4 Source Code
Verify the PX4 firmware path and click Validate to confirm that the PX4 source code is compatible with Simulink®.
In the preconfigured WSL distribution, the firmware path is pre-populated.
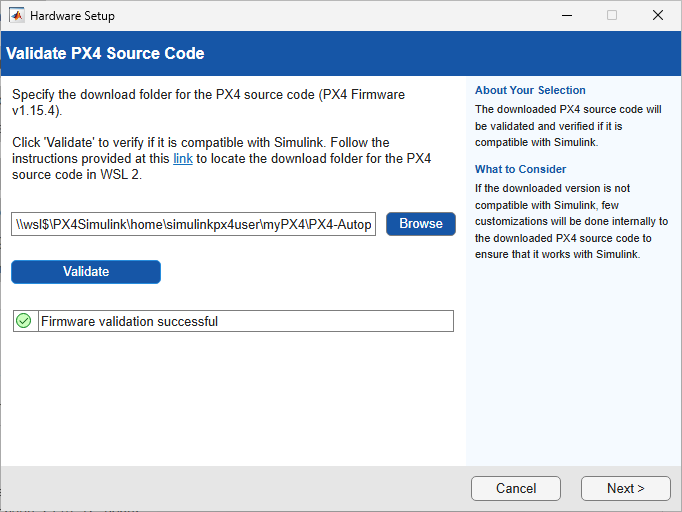
When validation is successful, click Next.
Select a PX4 Autopilot and Build Target
Select your PX4 Autopilot hardware and the corresponding build target configuration.
From the PX4 Autopilot drop-down list, select your autopilot board.
From the Build Target drop-down list, select the build target that matches the PX4 airframe and controller configuration you want to use.
Click Next.

Note
Build targets with names containing "multicopter", "Fixed-wing", or "VTOL" indicate that only the corresponding controller modules are included in the build. Targets labeled "default" include all available controllers, but selecting a default build target may lead to flash overflow when uploading the firmware.
Enable or Disable Default PX4 Controllers
Select whether to disable the default multi-copter and fixed-wing controller modules in PX4 firmware.
If you are planning to design your own controller in Simulink, select Disable multi-copter and fixed-wing controller modules in PX4 Firmware. If this checkbox is not selected, no modules of PX4 will be disabled.
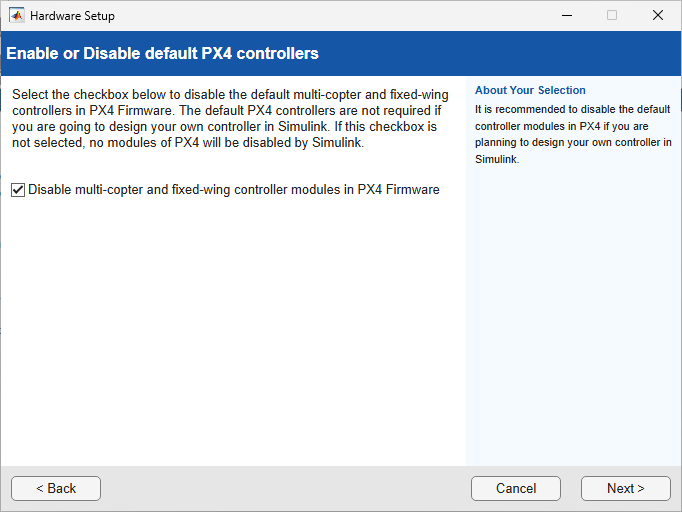
Click Next.
Download and Install QGroundControl
Download and install the ground control software QGroundControl (QGC) version 4.3.0. It is recommended to install QGC, as it provides necessary host drivers for the various PX4 autopilots.
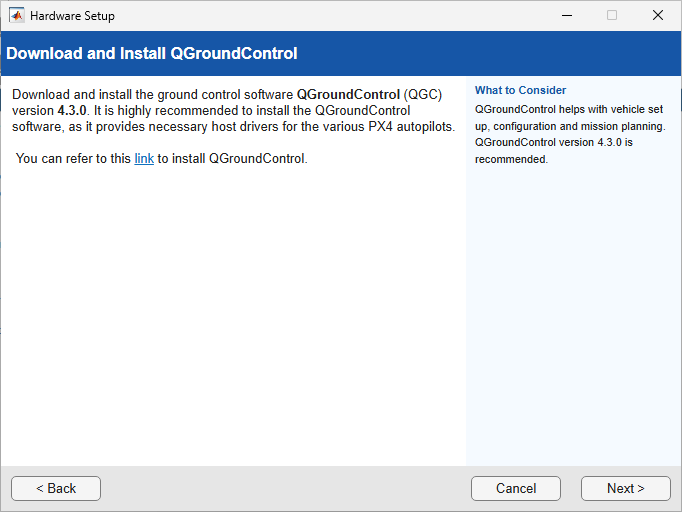
Click Next after installation is complete.
Build PX4 Firmware
Click Build Firmware to build the PX4 firmware based on the build target configuration you selected in the previous screen. This process can take several minutes to complete.
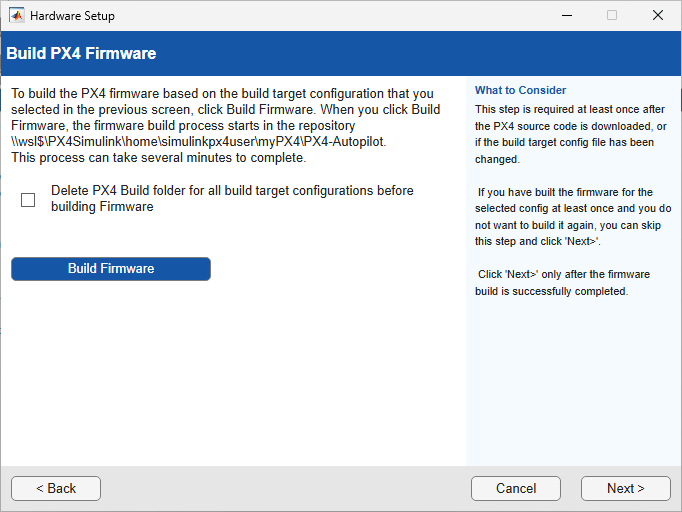
Optionally, select Delete PX4 Build folder for all build target configurations before building Firmware to perform a clean build.
When the firmware build completes successfully, a confirmation message is displayed.

Click Next only after the firmware build is successfully completed.
Test Connection
This screen is displayed only if you select a PX4 Autopilot hardware board, rather
than the PX4 Host Target, in the Select a PX4 Autopilot
and Build Target screen.
Connect the host computer to the PX4 Autopilot board using a USB cable, then upload the firmware and verify the connection.
From the Host Serial Port drop-down list, select Specify Serial Port or the detected COM port.
Click Upload Firmware to upload the PX4 firmware to the board. This process might take several minutes to complete.
Click Get Accelerometer data.
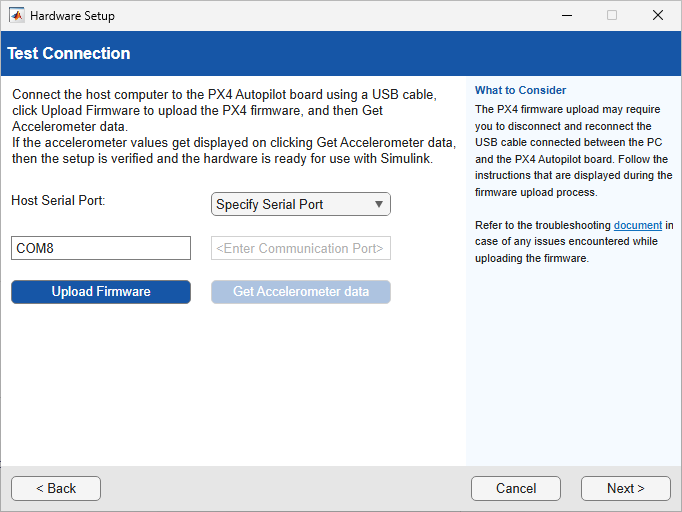
If the accelerometer values are displayed, the setup is verified and the hardware is ready for use with Simulink.
Note
The PX4 firmware upload may require you to disconnect and reconnect the USB cable connected between the PC and the PX4 Autopilot board. Follow the instructions that are displayed during the firmware upload process.
Hardware Setup Complete
The hardware setup process is complete. The PX4 Autopilot is ready for use with Simulink model.
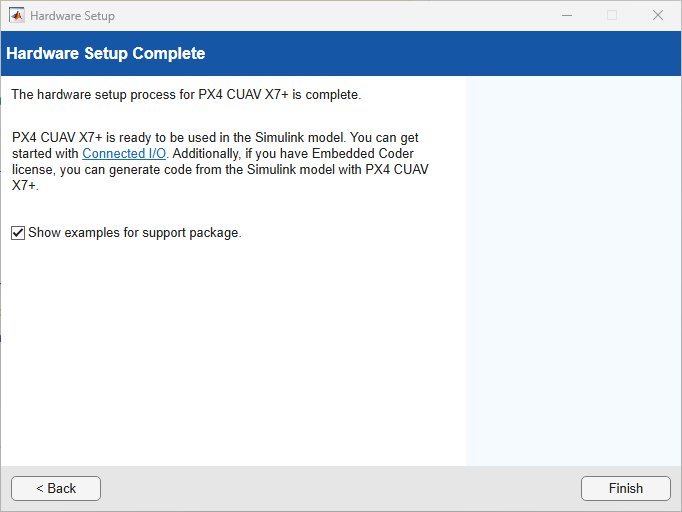
You can get started with Connected I/O. If you have an Embedded Coder license, you can generate code from the Simulink model.
Click Finish to close the Hardware Setup wizard.
Troubleshooting
Build shows failure even though compilation is successful
The build process might report a failure even when all compilation units pass
(for example, 1227/1227). This can occur when the build log includes the word
Error in non-critical warnings.
Resolution: If all compilation units pass, you can treat the build as successful. Rebuild the firmware if required.
Warning: Failed to translate network path
WSL displays a warning such as wsl: Failed to translate
'\\mathworks\...'. This warning occurs because WSL cannot resolve
Windows network (UNC) paths.
Resolution: Ignore this warning. It does not affect functionality.
WSL distribution not detected or not accessible
The PX4 firmware path (\\wsl$\PX4Simulink\...) is not
accessible.
Resolution: Verify that the distribution exists:
wsl -l -v
Ensure that PX4Simulink is listed and in the
Running or Stopped state.
Firmware path validation fails in Hardware Setup
Validation fails when specifying the PX4 firmware path.
Resolution:
Verify that the path exists in the WSL distribution.
Use the correct distribution name.
Try using lowercase:
\\wsl$\px4simulink\home\simulinkpx4user\myPX4\PX4-Autopilot
WSL is not installed or PX4-Ubuntu-22.04 distribution already exists
The Hardware Setup wizard cannot detect WSL, or a distribution named
PX4-Ubuntu-22.04 already exists and causes conflicts
during import.
Resolution:
If WSL is not installed, open an administrator Command Prompt and run:
wsl --install --no-distribution
If a distribution named PX4-Ubuntu-22.04 already exists,
unregister it before importing a new one:
wsl --unregister PX4-Ubuntu-22.04
After unregistering, restart the Hardware Setup wizard and import the distribution again.

