Perform Impact Analysis with a Project
This example shows how to perform file-level impact analysis using the Dependency Analyzer. It shows how to visualize project structure, analyze project dependencies, find required add-ons and products, identify and fix problems, and assess how a change will affect other project files.
For a walkthrough of the example, watch the video.
You can run a dependency analysis at any point in your workflow. In a collaborative environment, you typically check dependencies:
When you first set up or explore a project
When you run tests to validate changes to your design
Before you submit a version of your project to source control
Before you share or package your project
Visualize Project Structure and Dependencies
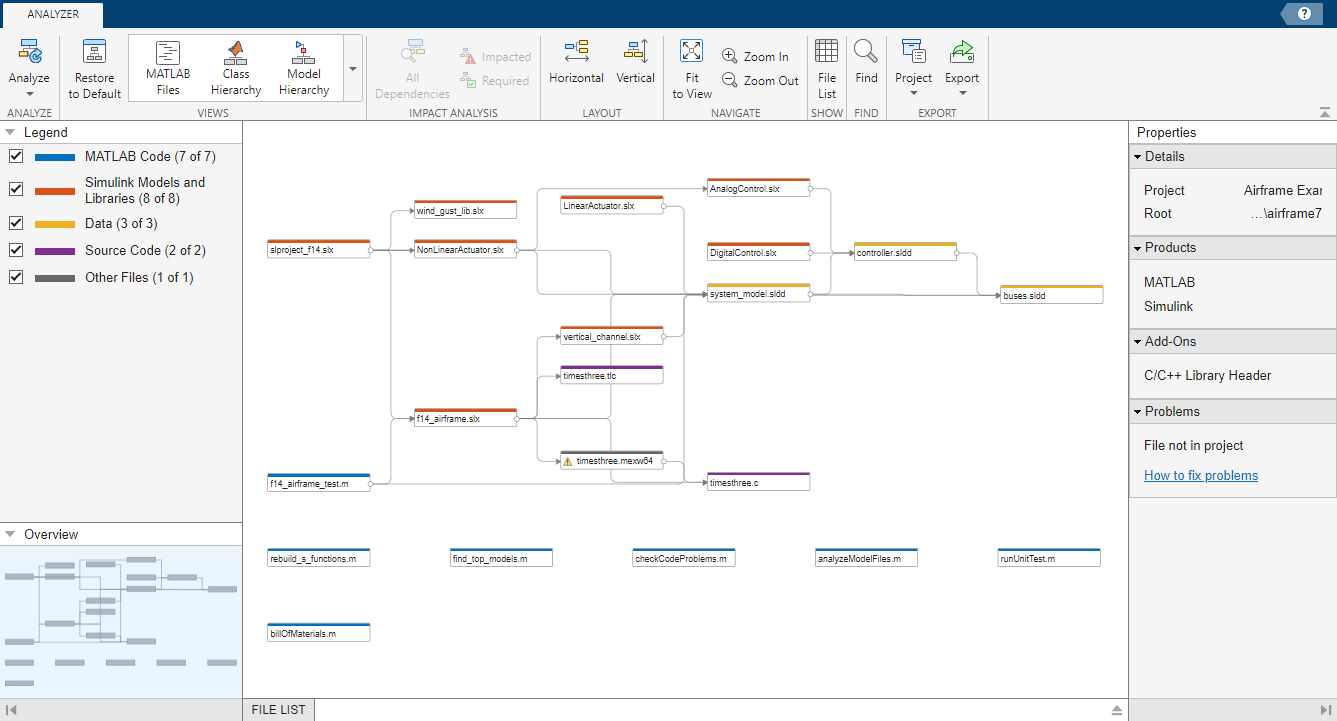
Run a dependency analysis on all the files in your project. On the Project tab, click the down arrow to expand the Tools section. Under Apps, click Dependency Analyzer.
The dependency graph shows:
Your project structure and its file dependencies, including how files such as models, libraries, functions, data files, source files, and derived files relate to each other. Each item in the graph represents a file and each arrow represents a dependency.
Relationships between source and derived files (such as .m and .p files, .slx and .slxp, and .c and .mex files), and between C/C++ source and header files.
If you do not select a file, the Properties pane shows:
Project details
Required products and add-ons for the entire project
List of problems for the entire project, such as missing files, files not in the project, files with unsaved changes, and out-of-date derived files
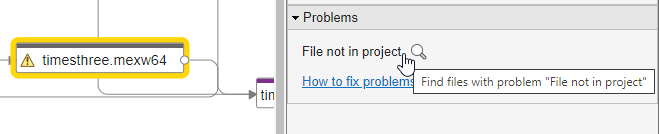
Investigate and Resolve Problems
The Dependency Analyzer identifies problems such as missing files, files not in the project, unsaved changes, and out-of-date derived files. You can examine problem files using the dependency graph or the file list.
1. Use the graph to investigate problem files. In the Properties pane, in the Problems section, point to File not in project and click the magnifying glass icon ![]() . The graph highlights the files with the selected problem. In this example, the
. The graph highlights the files with the selected problem. In this example, the timesthree.mexw64 file is not in the project.
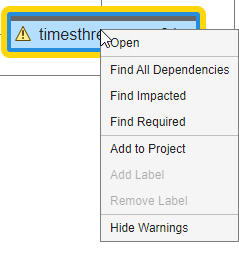
2. Fix the problem. Right-click timesthree.mexw64 and select Add to Project. To remove timesthree.mexw64 from the problem list without adding it to the project, right-click the file and select Hide Warnings.
View Modified Files
1. Open and make a change to the vertical_channel.slx model.
a. In the Project tab, in the Files view, double-click vertical_channel.slx to open it.
b. Move a block in vertical_channel.slx and save the model.
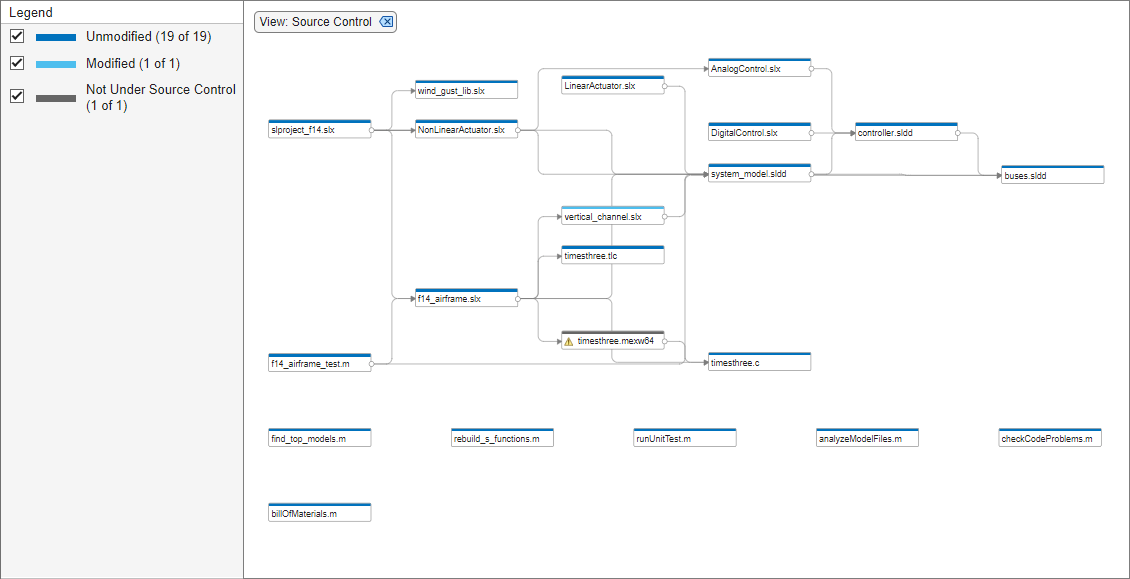
In the Dependency Analyzer, use the Views gallery to display the source control status of each file in the dependency graph.
2. In the Dependency Analyzer toolstrip, expand the Views gallery and click Source Control.
The color of each item in the graph now represents its source control status. Because of the change to
vertical_channel.slx, its source control status is now Modified.
Determine Impact of Change
You can use the Impact Analysis tools to find:
Files impacted by a change to a file
Files required by a file to run successfully
1. Use the Impact Analysis tools to assess the impact of your change on other files.
a. In the dependency graph, select the modified file, vertical_channel.slx.
b. In the Impact Analysis section, click Impacted.
The dependency graph filters files and shows only those impacted by the changes you made to vertical_channel.slx.
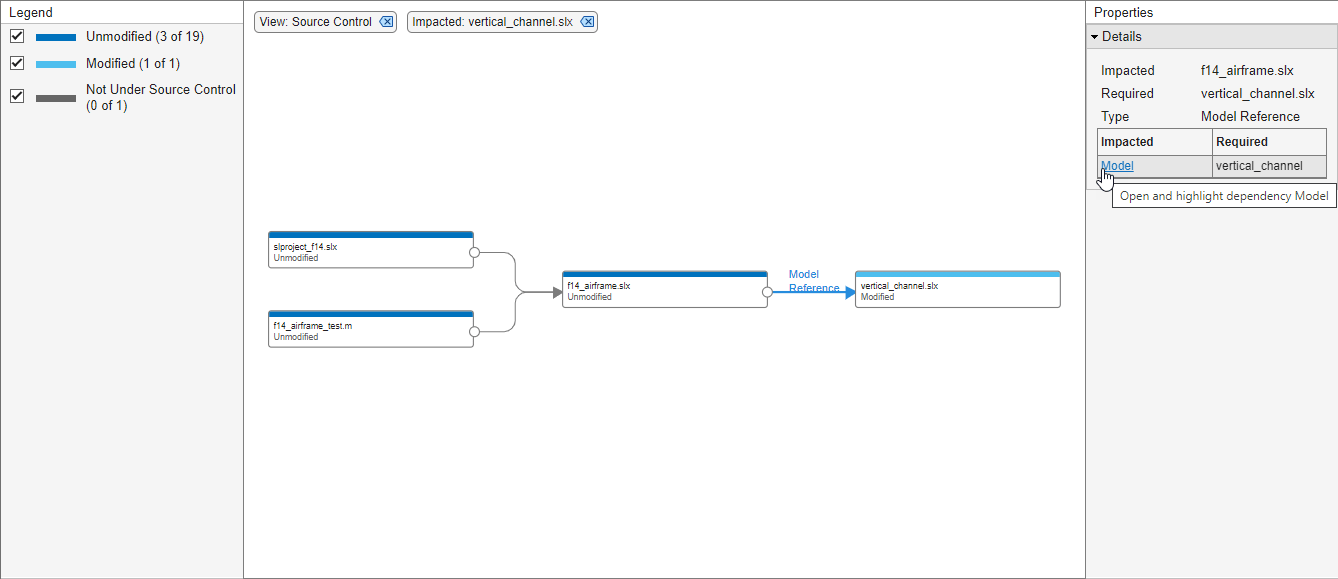
2. Find where the dependency to vertical_channel.slx is introduced in f14_airframe.slx.
a. Select the dependency arrow linking f14_airframe.slx to vertical_channel.slx.
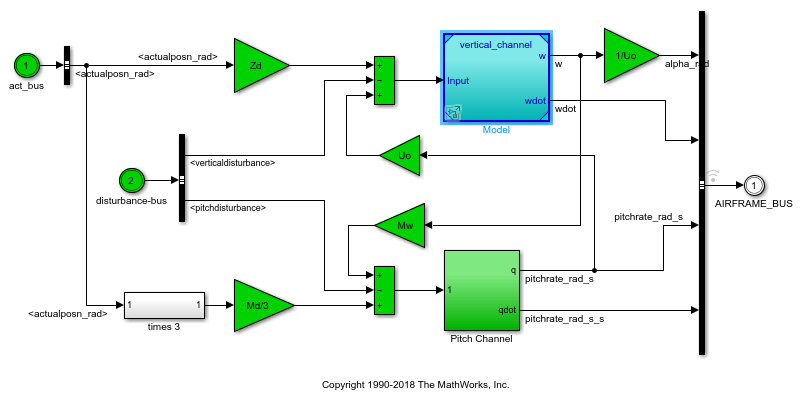
b. In the Properties pane, click the link under Impacted. Simulink® opens the model f14_airframe.slx and highlights the model block vertical_channel.
Identify Tests to Run
A project automatically associates Classification labels with each project files. Classification labels include Design, Artifact, Convenience, Derived, and Test labels. The Test label identifies which files are tests. If you need to run multiple tests, see Add Labels to Project Files.
Determine which tests you need to run to validate the changes to vertical_channel.slx.
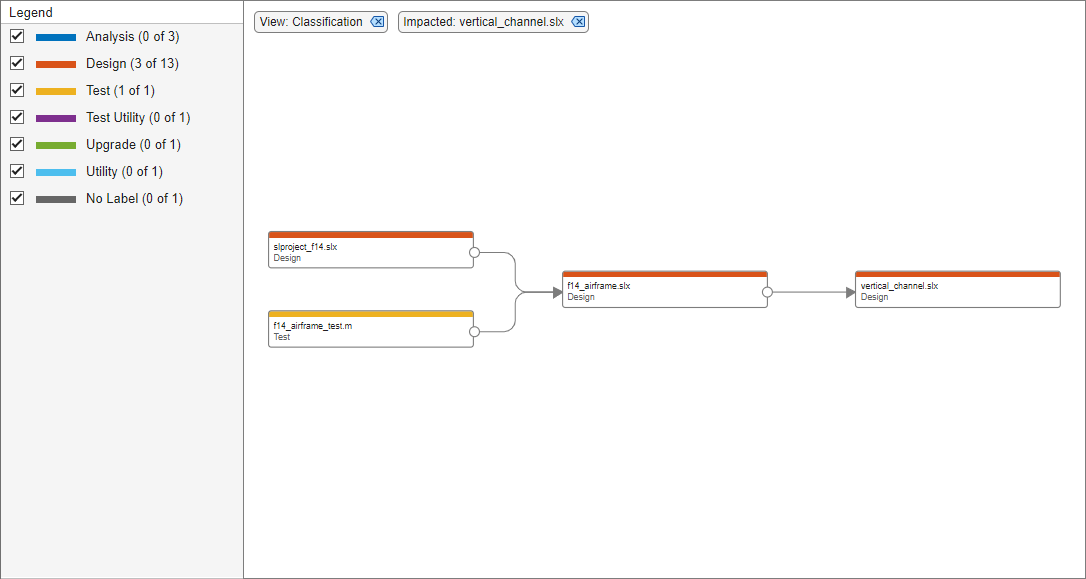
1. To display the Classification labels associated to each file in the dependency graph, expand the Views gallery and click Classification.
The dependency graph that shows only files impacted by the changes to vertical_channel.slx is now colored by label Classifications.
2. Identify the tests affected by your change.
The graph shows two Design files and one Test file impacted by the changes you made to vertical_channel.slx. f14_airframe_test.m is the test you need to run to validate the design changes.
Tip: To clear all filters and restore the graph to show all analyzed dependencies in the project, click Restore to Default. Alternatively, manually remove all filters that appear at the top of the graph.
![]()
Run Impacted Tests
Run the impacted tests to validate your design changes.
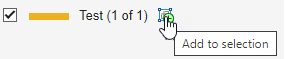
1. Select the f14_airframe_test.m test. If you need to run multiple tests, click the Add to selection button in the Legend instead.
2. Save the impacted tests paths to a variable. In the Dependency Analyzer toolstrip, in the Export section, select Export > Save to Workspace. Choose a Variable name, for example impactedtests, and click OK.
3. Run tests using the runtests function. In the Command Window, type:
results = runtests(impactedtests);
See Also
Functions
openProject|updateDependencies|dependencies.fileDependencyAnalysis|dependencies.toolboxDependencyAnalysis|runtests
Apps
Topics
- Analyze Project Dependencies in Simulink
- Find Dependencies of Selected Files
- Check Dependency Results and Resolve Problems