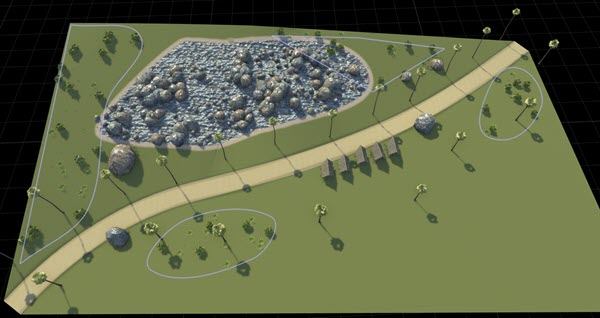
Manipulate Scene Objects
In RoadRunner, the tool you select can affect which objects in a scene that you can select, move, create, delete, or modify.
Select Objects
You can select objects in the scene editing canvas and in the 2D Editor pane.
Most operations in RoadRunner require selecting one or more objects to act on. The attributes of the selected objects are displayed in the Attributes pane. Many operations, such as those in the left toolbar for a selected tool, apply to the currently selected objects.
The current tool defines which types of objects are selectable. For example, the Road Plan Tool permits the selection of roads but not props, whereas the Prop Point Tool permits the selection of prop points but not roads.
Some types of objects can be selected only after first selecting a parent object. For example, in the Road Plan Tool, you must first select a road before the control points for that road are displayed.
RoadRunner enables you to select multiple objects together. Some tools permit the selection of multiple different types of objects at once.
This screenshot of a simple scene was taken in the Prop Polygon Tool. The scene contains four prop polygons, which are displayed as light purple outlines. The sections that follow use images from this scene to show how object selection works.

Selection Colors
Most tools in RoadRunner use a common color language to indicate the selection state. This image shows polygons in three different selection states.

The light purple polygons are objects that are not currently selected.
The red polygon contains the objects that are currently selected.
The yellow polygons contain the objects that the mouse is pointing to. This state provides a visual indication of the object that will be selected if you click.
A fourth color, gray, is also used when selecting overlapping objects. See Cycle-Select Overlapping Objects.
Select Single Object
To select an object, click the object in the scene. This action deselects any previously selected objects and selects the object the mouse is pointing to. In this image, the selection that was previously being pointed to has been clicked and is now selected.

Add Object to Selected Objects
To select an additional object, hold Shift and click an unselected object in the scene. In this image, an additional object has been added to the previous selection.
To remove an object from selection, hold Ctrl+Shift, and then click a selected object in the scene. This action removes that object from the selected objects, leaving the remaining objects selected.
Alternatively, to add or remove selected objects, hold Shift or Ctrl+Shift and perform a box select.
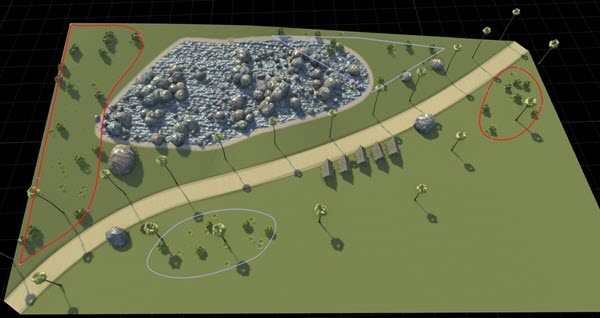
Box Select a Group of Objects
To perform a box selection, in the scene editing canvas, click and drag to draw a rectangle around the objects you want to select. There are two box selection options:
Overlap Box Selection — Select any objects that touch the box.
Containment Box Selection — Select only objects that are fully contained within the box.
The direction in which you draw the box dictates which selection type is used. This table indicates the selection type according to the direction in which you draw the box.
Toward top-left Containment | Toward top-right Overlap |
Toward bottom-left Overlap | Toward bottom-right Overlap |
In this image of overlap box selection, both polygons that are at least partially within the region are selected.
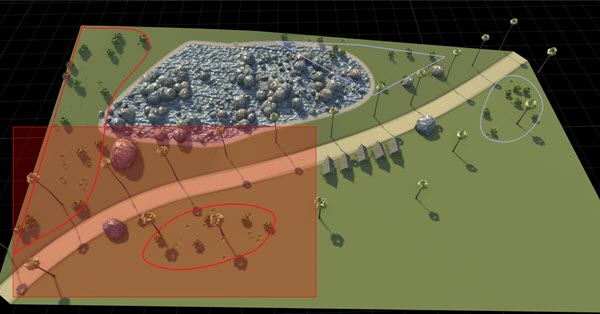
To perform an overlap box selection, click and drag in one of the directions indicated by the red boxes in the previous table. A red box appears, and any objects touching that box are selected. Optionally, hold Shift to add the objects to the selected set. Hold Ctrl+Shift to remove the objects from the selected set.
Tip
If no box appears, check that you did not click on or inside a draggable object in the scene. If you hold Shift prior to the click, a box selection occurs, even if your drag starts outside of a selectable object.
In this image of containment box selection, only the polygon that is fully contained within the region is selected.
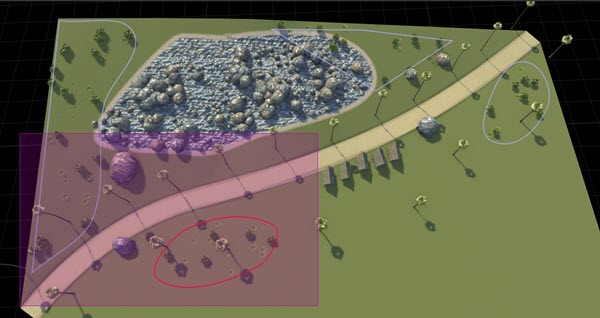
To perform a containment box selection, click and drag in the upper-left direction. A purple box appears, and only those objects fully contained within that box are selected. Optionally, hold Shift to add the objects to the selected set. Hold Ctrl+Shift to remove the objects from the selected set.
Tip
If no box appears, then it is likely that you started the box on or inside a selectable object in the scene. Check that your drag starts outside of a selectable object.
Select All Objects
To select all objects in the scene, from the menu bar, select Edit and then Select All, or press Ctrl+A. This image shows all of the prop polygons selected.
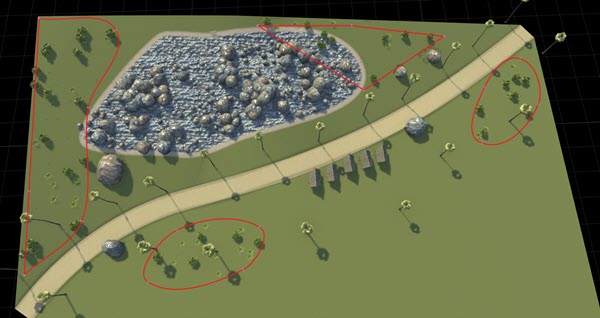
The behavior of a select all action depends on which objects you currently have selected.
If you have no objects selected, then all selectable objects in the scene are selected.
If you have objects selected, and any of those objects have unselected child objects, then the unselected child objects are selected. For example, if you select a single prop polygon using the Prop Polygon Tool, then the points on that polygon are displayed but are not selected. Performing a select all operation selects all the points on that polygon, not other polygons in the scene.
If you have objects selected, and all child objects are already selected (or no child objects exist), then all selectable objects in the scene are selected.
Deselect All Objects
To deselect all objects in the scene, from the menu bar, select Edit and then Deselect All, or press Ctrl+D. This image shows all previously selected polygons now deselected.
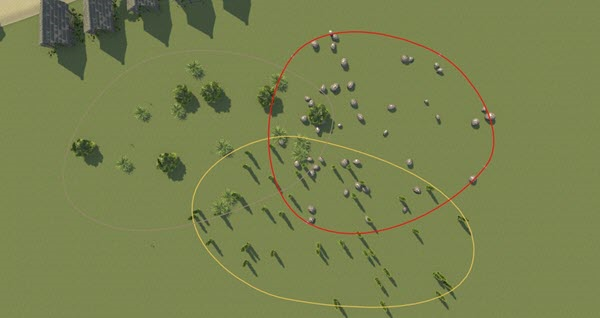
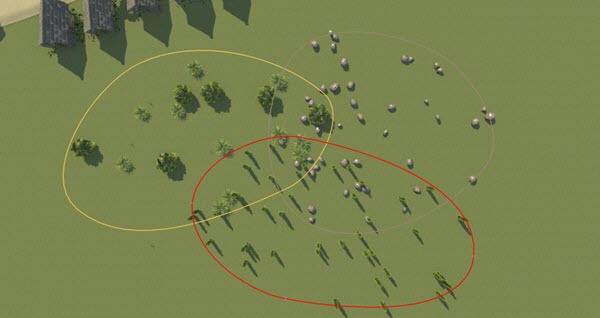
Cycle-Select Overlapping Objects
Sometimes multiple selectable objects overlap each other. For example, this image shows three overlapping prop polygon objects.
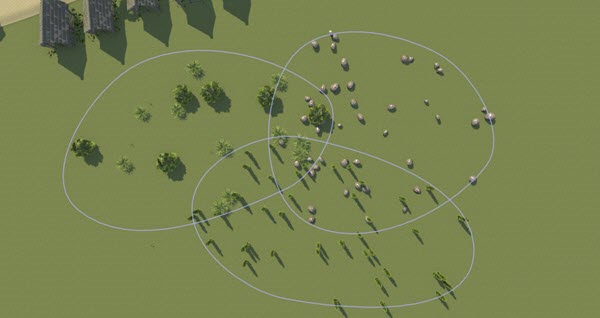
In these cases, you can cycle between the different objects by repeatedly clicking on the overlapping portion. Each click selects the next overlapping object.
Move the pointer over the area where the object overlap, which in this case is in the middle of the three overlapping polygons. The first object you can select displays in yellow, while the other overlapping objects display in gray.

Click the overlapping portion to select the object. The selected object displays in red, and the object you can select on the next click displays in yellow.
Continue clicking to cycle through the overlapping objects until you reach the object you want to select. This image shows the next cycle in the selection.
Move Objects
Default Tool Translation and Rotation
For tools that enable you to move objects in the scene by selecting and dragging them, follow these steps:
Select one or more objects.
Click and drag a selected object to move it. If multiple objects are selected, dragging one object moves all of the selected objects.
The exact behavior when moving objects depends on the specific tool and type of object. For example:
Moving props in one of the prop tools automatically projects their heights to the ground surface. For more details on prop tools, see Props and Signs.
Moving lane marking nodes in the Lane Marking Tool are constrained to lie along the lane boundary curve.
Moving a road control point in the Road Plan Tool can automatically update other roads to enforce tangential continuity.
You can also move many objects during their initial creation.
Translation Tooltip
After selecting an object using the Selection
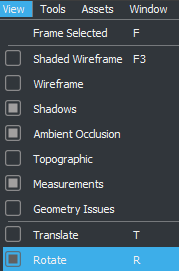
Tool, road tools, or property tools, select View > Translate to display the translation manipulator, shown in this image.
Alternatively, you can select the translation manipulator by clicking the ![]() button from the vertical menu on the left side of
the screen.
button from the vertical menu on the left side of
the screen.
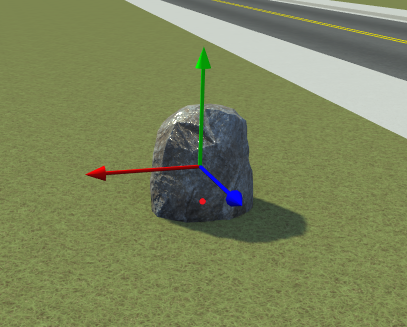
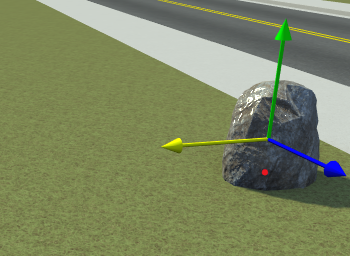
Click and drag the red, blue, or green arrow to translate the object in the horizontal and vertical directions, respectively. This image shows the rock translated in the horizontal direction.
Rotation Tooltip
Use the rotation manipulators to seamlessly rotate a single object or a group of objects interactively within a scene. Rotation manipulators support the rotation of these objects in a RoadRunner scene:
Roads and their slip connections
Surfaces
Buildings
Props (rotation along control points, curves, and polygons)
Markings (rotation along control points, curves, polygons, and parking spaces)
To rotate a single object, select the Prop Point Tool and then select a prop in the scene. From the View menu, select Rotate.
Alternatively, you can select the rotation manipulator by clicking
the ![]() button from the vertical menu on the left side of
the screen.
button from the vertical menu on the left side of
the screen.
Three rings, representing rotation around the x-, y-, and z- axes, appear on the scene canvas around the selected object.
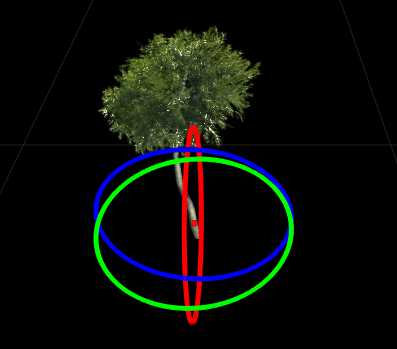
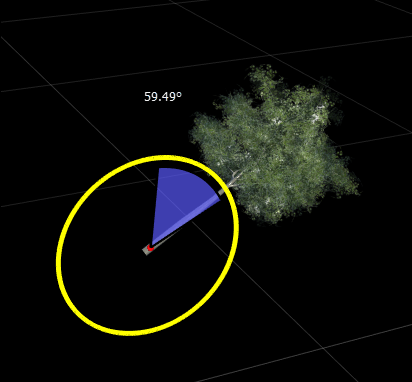
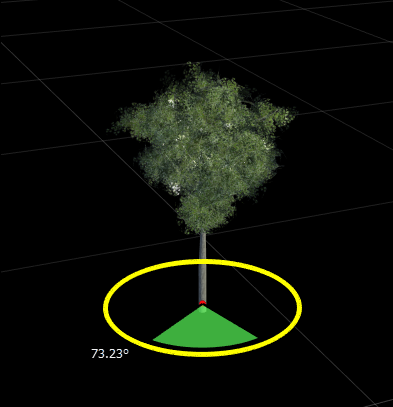
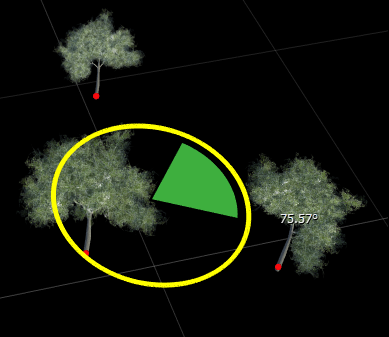
Drag the rings to make rotational adjustments to the object. During rotation, the selected ring becomes yellow and the other two rings disappear from the canvas. The angle indicator alongside the selected ring indicates the angle of rotation along the axis of rotation around the selected axis. These images show the rotation of a tree prop along the x- and z- axes, respectively.
Note
Object rotation in RoadRunner scenes is compound. If you rotate an object around one axis (for example, the x- axis), this affects the angle of rotation around the other two axes ( y- and z- axes).
To rotate a group of objects, first select the Selection Tool. Then, click the scene canvas and drag to select all the objects in the rotation group. For more information on selecting multiple objects at once, see Select Objects.
From the View menu, select Rotate.
Alternatively, you can select the rotation manipulator by clicking the ![]() button from the vertical menu on the left side of
the screen.
button from the vertical menu on the left side of
the screen.
Three rings, representing rotation around the x-, y-, and z- axes, appear on the scene canvas around the center point of the selected objects.
Drag the rings to make rotational adjustments to the selected objects. The angle indicator alongside the selected ring indicates the angle of rotation around the selected axis.

The new rotation angle does not apply to the selected objects. The objects in the scene maintain their relative positions to the center point, and characteristics such as slip roads, corners, and maneuver roads are preserved.
Note
Roads in RoadRunner scenes support rotation around the z- axis, because the control points along the roads do not support rotation along the x- and y- axes.
A selected set of props rotate around the center point of the selection, such that all props maintain their starting distance from to that center point. In this image, three selected trees rotate around a center point, maintaining their initial distance from the center point.
Create Objects
Many tools provide the ability to create objects. The type of object created and the specific creation steps depend on the tool. For step-by-step creation instructions, see the documentation for the specific tool.
In most cases, you can right-click either an existing object or an empty location in the scene to create an object. Often, you can keep holding down the right-click button to simultaneously create and drag the object.
Depending on the specific tool, you might need to first select an appropriate asset in the Library Browser. Some tools require an asset to be selected, while others will change their behavior depending on whether or not an asset is selected.
Some types of objects can be created by clicking an asset in the Library Browser and dragging the object into the scene. For example, dragging Prop Model Assets into the scene adds prop points and automatically switches the currently selected tool to the Prop Point Tool.
Delete Objects
Most tools enable you to delete selected objects. You can refer to the documentation for a specific tool to learn about deleting objects by using it, however, the steps are often similar to these ones:
Select one or more objects.
Select the Edit option and then the Delete option in the menu bar, or press Delete.
If an object cannot be deleted, the bottom status bar typically displays an error message.
Modify Objects
When you select an object in a scene, you can then modify its properties in the Attributes pane. If you select multiple objects, then the Attributes pane provides additional features for interacting with them.
This Attributes pane shows the selection of two props created by the Prop Point Tool.
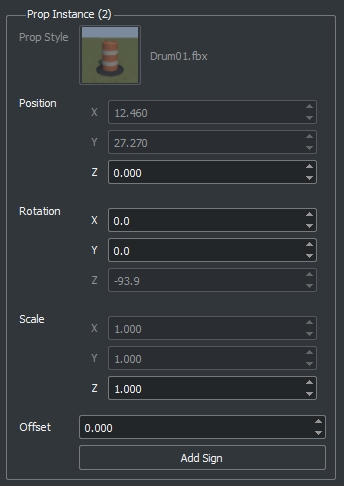
In this selection:
The group label, Prop Instance (2), shows the number of selected objects selected, which is two in this case.
The Prop Style asset picker is dimmed, which indicates that the two props have different assets assigned to them.
The asset picker shows the style of the first selected object, which in this case is a drum barrel.
If the asset picker value changes, then the picker modifies all selected objects and the asset picker is longer dimmed.
The selected objects have different
Position.XandPosition.Yvalues, but their height (Position.Z) value is the same. Modifying thePosition.XorPosition.Yvalues applies the same value to all selected objects.Clicking a button, such as the Add Sign button in the figure, applies the operation to all selected objects.
To modify an object to use a different asset, select an asset from the Library Browser and drag it onto the asset picker image in the Attributes pane.
Note
Most asset pickers accept only certain types of assets. For example, you can assign Prop Model Assets and Extrusion Assets to a prop curve by using the Prop Curve Tool, but you cannot assign a Material Assets.
Some asset pickers enable you to have no asset assigned. To remove an asset from an asset picker, right-click the asset picker and select Clear. Alternatively, click the asset picker and press Delete.
To quickly locate the currently displayed asset in the Library Browser, click the asset picker. The asset is selected in the Library Browser.
Although the asset is selected, its attributes do not display. To see and modify the asset attributes, click the selected asset in the Library Browser.