フリーハンド ROI を使用したセグメンテーション マスクの調整
この例では、論理セグメンテーション マスクをフリーハンド ROI オブジェクトに変換して調整する方法を説明します。この方法では、フリーハンド ROI オブジェクトの対話型の形状変更機能を活用し、セグメント化するイメージ領域の形状に対して、セグメンテーション マスクのエッジの適合度を高めます。
はじめに - イメージのセグメンテーション
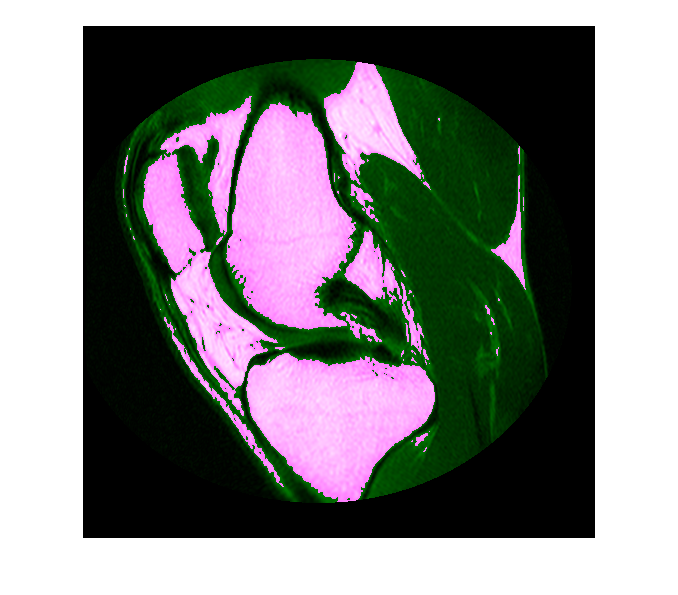
セグメンテーション アルゴリズムを使用して、イメージの関心のある部分をセグメント化します。説明のために、この例では k-means クラスタリングを使用して、MRI イメージ内の骨と組織をセグメント化します。
im = dicomread("knee1.dcm");
segmentedLabels = imsegkmeans(im,3);
boneMask = segmentedLabels==2;
imshowpair(im,boneMask);
セグメンテーション マスクの後処理
自動化されたセグメンテーション アルゴリズムの結果には、マスクをクリーンアップする後処理が追加で必要になることがよくあります。最初の手順として、最も大きい 2 つの骨である大腿骨と脛骨をマスクから選択します。
boneMask = bwareafilt(boneMask,2);
imshowpair(im,boneMask);

マスクからフリーハンド ROI オブジェクトへの変換
自動 k-means セグメンテーションのエッジを調整するには、2 つのマスクを対話型のフリーハンド ROI オブジェクトに変換します。まず、これらの 2 つのセグメント化された領域を表す境界ピクセルの位置を取得します。ROI の境界をマスクに含めます。これらの ROI オブジェクトは高密度でサンプリングされ、その Position プロパティの解像度はイメージ ピクセルと同じになります。
blocations = bwboundaries(boneMask,"noholes",TraceStyle="pixeledge");
figure
imshow(im,[]);
for ind = 1:numel(blocations)
    % Convert to x,y order
    pos = blocations{ind};
    pos = fliplr(pos);
    % Create a freehand ROI
    drawfreehand(Position=pos);
end

ROI の編集
フリーハンド ROI オブジェクトでは、シンプルな対話型の 'ラバーバンド' 編集が可能です。ROI を編集するには、ROI 境界に沿っていずれかのウェイポイントをクリック アンド ドラッグします。ROI のエッジをダブルクリックするか、エッジを右クリックすると表示されるコンテキスト メニューを使用して、境界の任意の位置にウェイポイントを追加できます。
フリーハンド ROI からマスクへの逆変換
ROI を編集したら、ROI オブジェクトの createMask 関数を使用して、これらの ROI オブジェクトを変換してバイナリ マスクに戻します。最終マスクに境界ピクセルを含めるには追加の手順が必要になることに注意してください。
% Convert edited ROI back to masks
hfhs = findobj(gca,Type="images.roi.Freehand");
editedMask = false(size(im));

for ind = 1:numel(hfhs)
    % Accumulate the mask from each ROI
    editedMask = editedMask | createMask(hfhs(ind));
end
参考
dicomread | imsegkmeans | bwareafilt | bwboundaries | drawfreehand | Freehand | createMask