Predict Battery State-Of-Charge Using Dynamic System Learner App
R2026bThis example shows how to train a multi-input single output autoregressive integrated moving average with exogenous input (ARIMAX) model using the Dynamic System Learner app. You can use the workflow in this example to train autoregressive moving average with exogenous input (ARMAX) models with different structures and training options.
The Dynamic System Learner app trains models for time series modeling. For more information on the app, see Dynamic System Learner.
Import and Preview Data in App
Load the data to import into the app. This example uses battery state-of-charge (SOC) data that contains the SOC as the output data and the current and temperature as the input data.
load DSL_ARIMAX_data.matSet the random number seed for reproducibility.
rng(0)
Open the Dynamic System Learner app.
dynamicSystemLearner
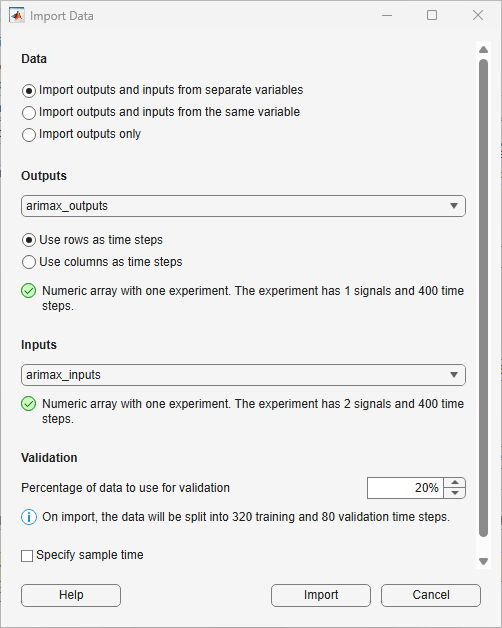
To import data into the app, on the toolstrip, click New > Numeric or timetable. The Import Data dialog box opens. Under the Data section, select Import outputs and inputs from separate variables. Under Outputs, select arimax_outputs. Because the time steps in this data are in rows and the channels are in columns, select Use rows as time steps. Under Inputs, select arimax_inputs.
Under Validation, keep the default value of 20% in the Percentage of data to use for validation box.
Click Import.
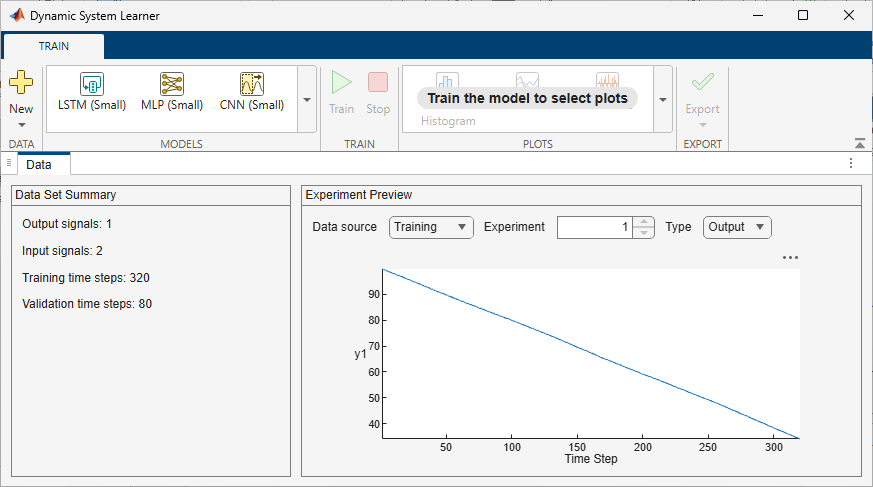
In the Data Set Summary section, verify that the data contains one output signal and two input signals and that the app will split the data into 320 training and 80 validation time steps. The app displays the training and validation data plots for the outputs and inputs in the Experiment Preview pane.
Configure Model Structure
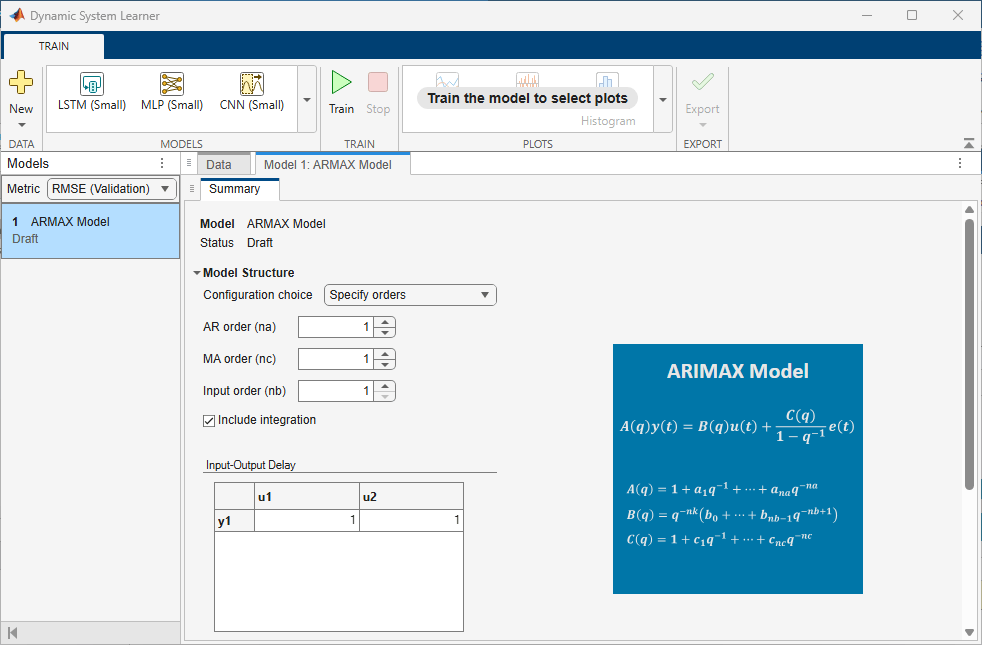
On the toolstrip, from the Models gallery, select ARMAX Model. The Summary tab opens.
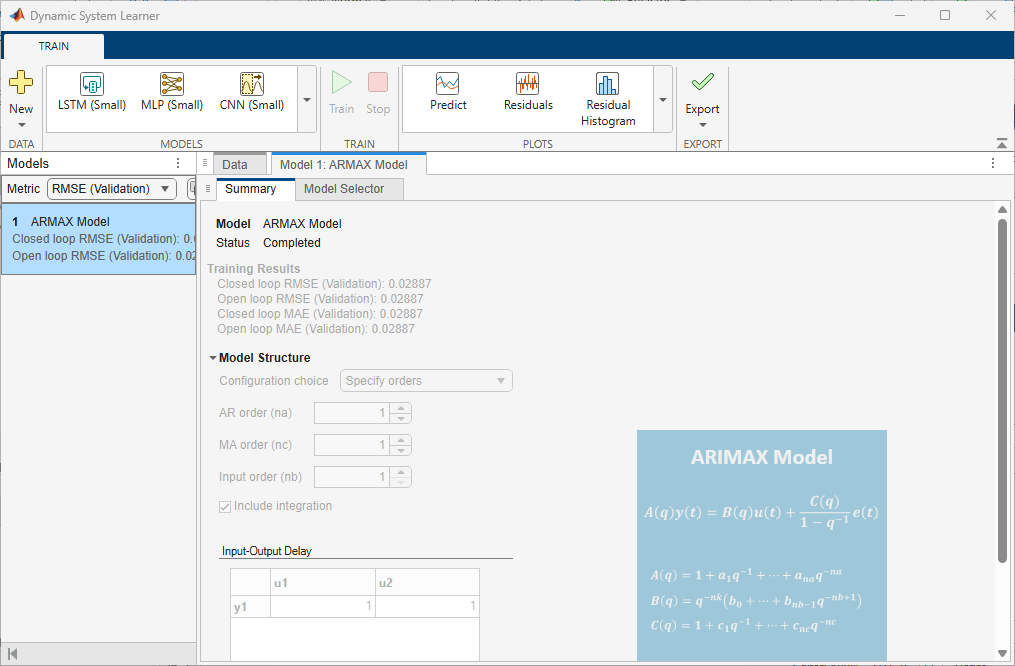
To configure the ARMAX model as an ARIMAX model, in the Model Structure section, in the Configuration choice menu, click Specify orders. Set AR order (na), MA order (nc), and Input order (nb) to 1. Select Include integration. The ARIMAX model equation appears to the right of the options in the app. Keep the default values for the other options. For more information on the options available to configure the model structure, see Configure ARMAX Model Structure and Training Options.
Train Model
To train the ARIMAX model, on the toolstrip, click Train.
When the training completes, a plot displaying a set of candidate models and their respective normalized root mean squared error (NRMSE) values appears on the Model Selector tab. At the top of the plot, in the Metric menu, you can choose other quality metrics that you want the plot to display. The available quality metrics are RMSE, NRMSE, MAE, AIC, and BIC. If you select Metric as RMSE, NRMSE, or MAE, you can select Open-loop or Closed-loop at the top right of the plot to display the respective plots. To the left of the plot, you can choose all the models that you want to display. You can also choose to display the Training dataset, Validation dataset, or both.
The plot automatically highlights and selects the model with the lowest NRMSE value on training data in the closed-loop metric setting.You can see the model information in the Model Details below the plot. You can select a different model by clicking the model in the plot or selecting it in the Select model list.
The qualities of the candidate models change based on the metric type and metric setting you choose. For a chosen metric, the candidate model with a lower metric value is better. When selecting a model, you can also weigh the value of the chosen metric against the complexity of the model.
For more information on model training and selection, see Estimate ARMAX Model Using Dynamic System Learner App.
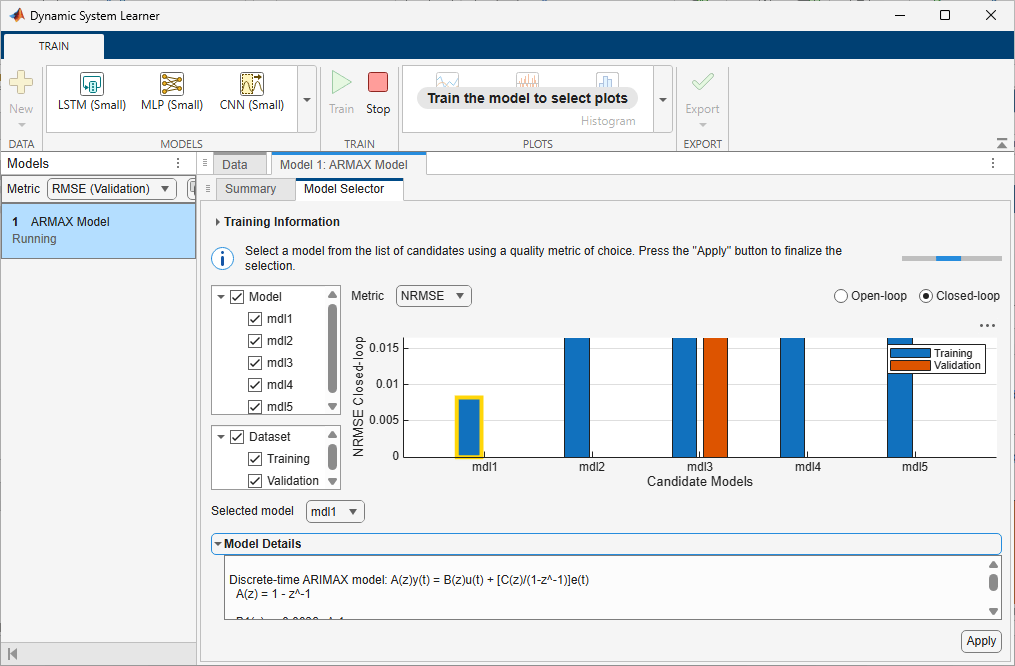
For this example, to finalize the model selected by the app and complete the training process, click Apply.
View the Training Results on the Summary tab.
Predict Values for Data
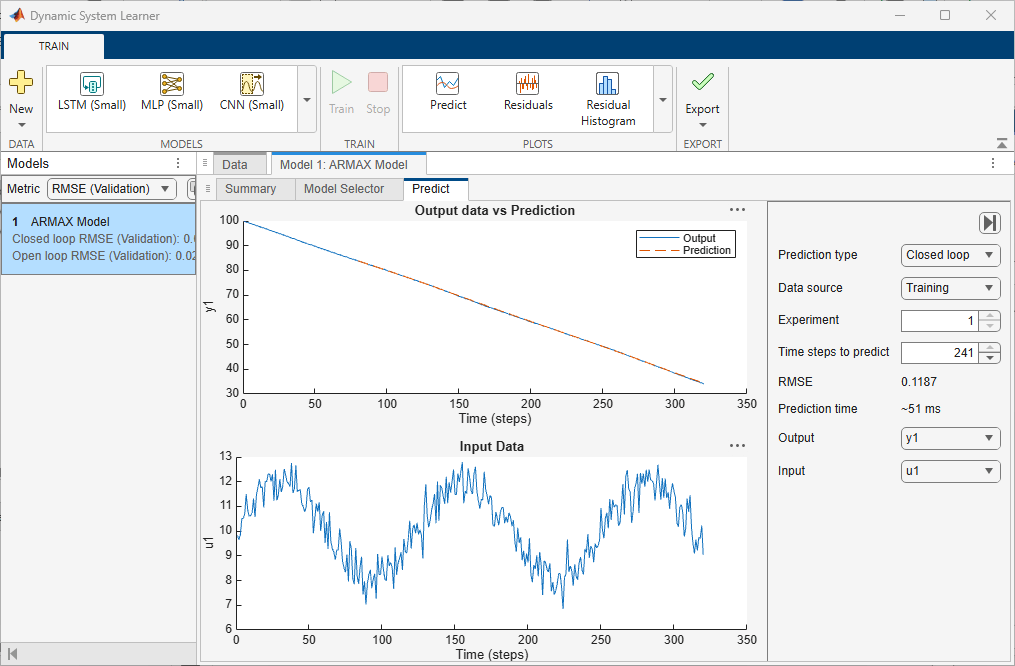
To predict values for the training and validation data using the selected model, on the toolstrip, click Predict. Set the Prediction type to Closed loop and Data source to Training. Set Output and Input to different values to view the corresponding output versus input plots. The predictions of the trained model match the true values well.
For more information on the available options, see Predict Values for Data.
Export Model
To export the trained model and generate code to predict new values for test data, on the toolstrip, click Export > Export to Workspace and Generate Code.
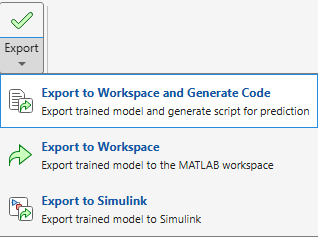
A new variable, trainedModel_1, appears in the MATLAB® workspace. This variable is a structure containing the trained idpoly model. A new live script containing the generated code opens in the MATLAB editor.

