Import and Edit Requirements from a Microsoft Word Document
This example shows you how to import and update requirements from a Microsoft® Word requirements document. After you import the requirements, you can modify the requirements in either the Requirements Editor or the Word document. This functionality is available only on Microsoft Windows® platforms. Simulink® Online™ does not support importing requirements from Microsoft Word documents.
Open the Project and Import the Requirements
Open the CruiseRequirementsExample project that includes the model and supporting files.
openProject("CruiseRequirementsExample");Next, import the requirements into the Requirements Editor.
Open the Requirements Editor. In the Apps tab, click Requirements Editor.
Import the requirement set. Click Import.
In the Importing Requirements window, set Document type to
Microsoft Word Document.Click Browse, open the documents folder, and select
crs_req.docx.In the Content section, select Plain text. Under Requirement Identification, select Use bookmarks to identify items and serve as custom IDs and Allow updates from external source. For more information on import options, see Import Options for Microsoft Word Documents.
In the Destination(s) section, set Requirement Set to a folder on the path and change the file name to
imported_reqs.slreqx.
The Requirements Editor opens the imported requirement set and displays the requirements under the top-level node, Import1.
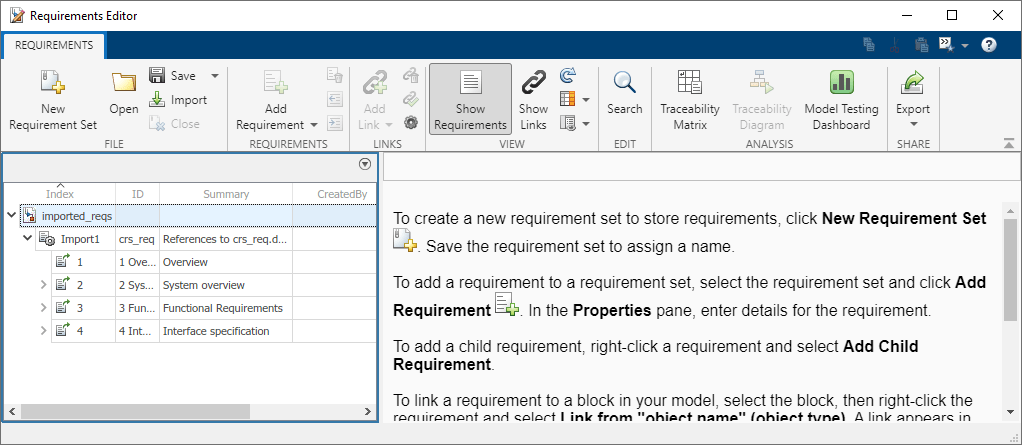
The requirements import based on their assigned heading numbers in the Word document.
Edit the Requirements
After you import the requirements, you can edit the requirements in the Word document and then update the imported requirements, or edit the imported requirements directly in the Requirements Editor.
Change the Requirements in the Word Document
To add a requirement to the Word document:
Open the Word document and add a new requirement. Maintain the heading hierarchy used throughout the document.
Add a bookmark to the requirement. To add a bookmark to your Microsoft Word document, see Add or delete bookmarks in a Word document or Outlook message on the Microsoft website.
Save the Word document.
In the Requirements Editor, select the top-level node of the requirement set. In the right pane under Requirement Interchange, click Update to update the referenced requirements.
To view the changes, select Import1. In the right pane, click Comments to see the changes to the file.

Change the Referenced Requirements in the Requirements Editor
You can also edit a referenced requirement in the Requirements Editor. In the Requirements Editor, select a referenced requirement. In the right pane, under Properties, click Unlock. You can unlock all referenced requirements in the requirement set by selecting the Import node and, in the right pane, under Requirement Interchange, clicking Unlock All.

You can revert the requirement set to the requirements in the Word file by updating the top-level Import node. Click Import1 and, in the right pane, under Requirement Interchange, click Update.
See Also
slreq.ReqSet | Requirements Editor
Related Topics
You can also select a web site from the following list:
Americas
- América Latina (Español)
- Canada (English)
- United States (English)
Europe
- Belgium (English)
- Denmark (English)
- Deutschland (Deutsch)
- España (Español)
- Finland (English)
- France (Français)
- Ireland (English)
- Italia (Italiano)
- Luxembourg (English)
- Netherlands (English)
- Norway (English)
- Österreich (Deutsch)
- Portugal (English)
- Sweden (English)
- Switzerland
- United Kingdom (English)